This article describes how I modified my Kity 419 Table Saw to improve its dust extraction. I had been on the verge of buying a new table saw. I’d researched online to see what was available. For the sort of size I was looking for, I came to realise that most of the saws of that type were in fact just clones of my Kity. As it was a well-respected model, I decided to keep mine and modify it to address some of its shortcomings, the most obvious of which was its very poor dust extraction capability. In use, sawdust would fly out of every hole in the casing.
Much of the inspiration for my mods came from various posts on UK Workshop Forums, and this post in particular, wherein some kind soul has collated many different articles on the subject. I’ve owned this Kity saw since new, back in the last millennium. Since then Kity, sadly, have stopped trading. However, the basic design of the saw lives on in the many clones still available. These include:
- Axminster TS-200 (and TS-250)
- Scheppach TS82
- Charnwood W619
- NOVA TS-8
So some of the procedures here might be applicable to those other saws, although maybe not the ones with enclosed cabinet bases. The mods I made can be summarised as:
- Remove old leg stand
- Dismantle and clean the internal mechanisms
- Remove one side of internal blade guard
- Modify side panels for easy future removal
- Seal holes in casing
- Fit Big Mouth Dust Hood
- Mount on new leg stand
- Make shelf and support for lower dust outlet bend
- Fit new power inlet socket
- Make and fit a ‘kill switch lever’
- Adjust blade to be parallel to mitre slots
Here’s the old dust extraction arrangement

Dismantling the Saw
First I removed the sliding table carriage
Then I removed the extension tables and the rip fence guides
Then I unbolted it and lifted the saw off the leg stand
.. and turned it upside down, after removing the blade guard, riving knife and blade
I thought it would be easier to work on with the table removed so I undid all the allen bolts
.. and removed the table
I gave the insides a good clean out with the shop vac and a brush.
Modifying the Inner Blade Guard
I spent at least half an hour undoing the extremely-difficult-to-reach nyloc nuts securing the inner blade guard, using a ratchet ring spanner and only able to turn probably 1/6th of a turn at a time. Later I realised that if I’d lowered the arbour, the nuts would have been exposed enough to get a proper socket on them and would probably have taken less than a minute to remove! DOH! With the nuts off, I removed the inner blade guard
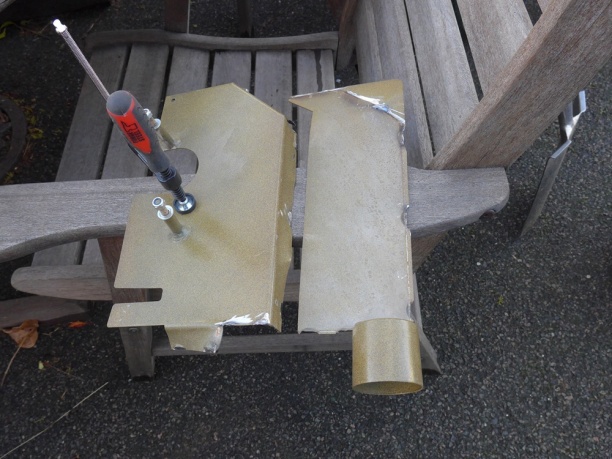
.. and clamped it to a garden chair
Using a 4½” angle grinder I ground the spot welds off
and separated the two halves of the guard
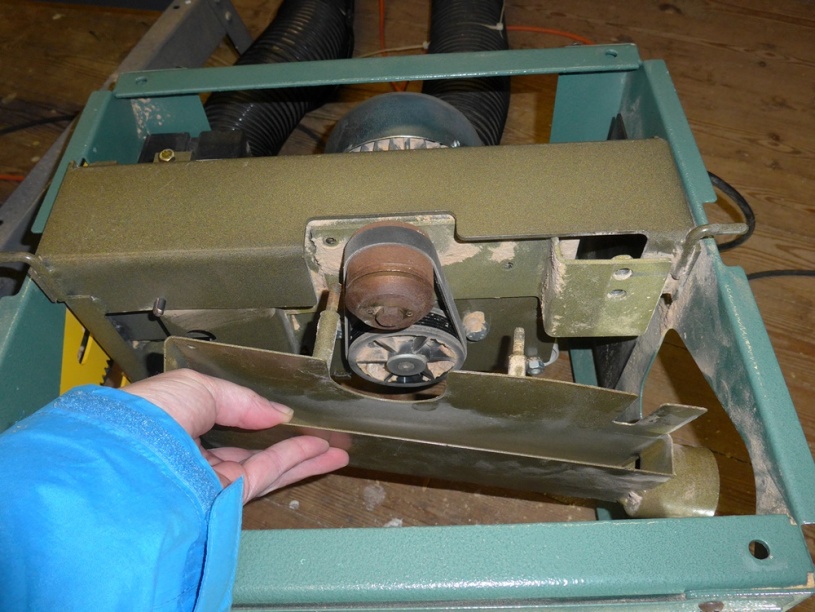
Then I refitted one half back on the saw. I could have just removed the guard entirely but I think that leaving just this half on should help deflect dust away from the motor and drive belt, while still allowing it to fall down towards the extraction point
I refixed the table to the body.
Assembling the Leg Stand
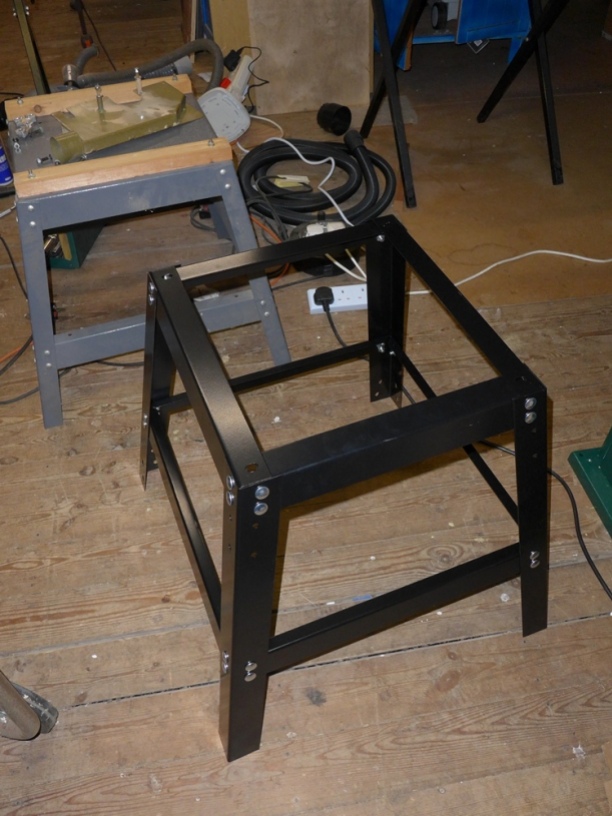
Next I assembled the new leg-stand
Fitting the Dust Hood
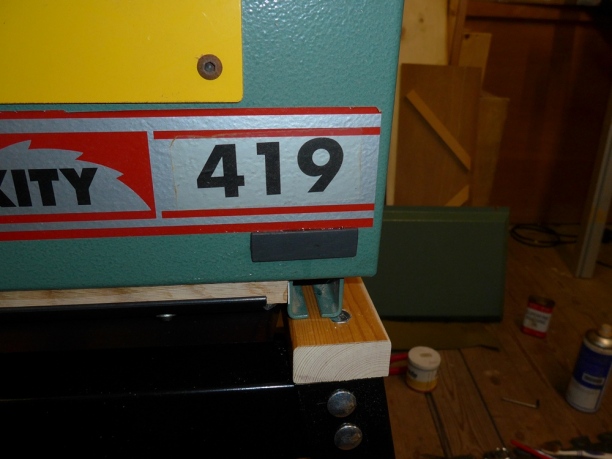
I tested to see how the dust hood fit. It was too large to sink all the way into the leg stand so I would need to raise the saw slightly above the leg stand using pieces of timber to allow clearance.
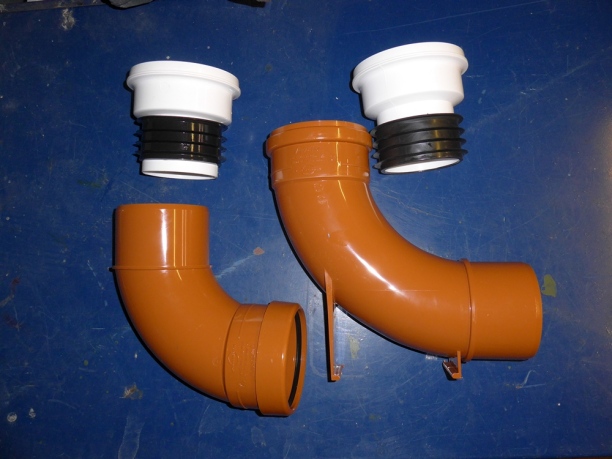
I had purchased a couple of 110 mm underground pipe bends and various pan connectors. I found that these all fit together quite well and can couple to the dust extractor very easily, and they were a lot cheaper than purpose-made fittings. My preference was to use the larger bend as it offers the airflow a more gradual change of direction. Tight bends are not advisable in dust extraction systems.
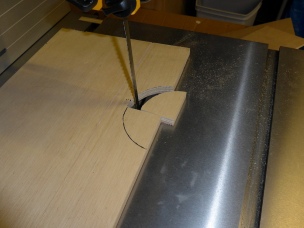
I measured the Big Mouth Dust Hood against the underneath of the saw. It was quite a good fit but slightly too wide to fit between the two lower mounting rails. I trimmed about 1 cm of plastic from each side using the bandsaw.
To trim the side nearest to the outlet, I had to tilt the Big Mouth so that it could fit under the blade guides, so I ran it along a piece of timber mounted next to the blade
With the surplus plastic removed it now fit nicely between the runners
It just required a small section of plastic to be removed from 2 corners, using a multi-tool
I now needed a way to fix the hood to the underneath of the saw body. I used strips of oak to form a frame onto which the hood could be mounted. (In this photo you can see the result of more cleaning and lubricating I had done inside the saw)
I attached the oak frame to the saw using clear epoxy resin
I then fixed the dust hood to the oak frame using round-head screws and washers on the end lips only
With the saw still upside down I positioned the leg stand to see how it fit.
.. and checked to see if the rest bend would be in a suitable position to be able to connect the dust extractor hose
Fitting the Saw to the Stand
My old leg stand was purpose-built for the Kity saw and the bolt holes in the stand lined up perfectly with the runners on the base of the saw. The holes in my new leg stand don’t align with the runners on the saw, so I needed to do it in two stages – mount the wood strips to the leg stand and then drill holes in the wood strips to match the runners. First I drilled the holes to attach the wood to the stand
The bolts needed to be flush with the top of the wood so I drilled a wider hole slightly smaller than the bolt head width and just deep enough to allow the head to sink into the wood flush with the surface
I then pulled the head into the wood by tightening the nut from the other side
I bolted the wood to the leg stand, placed the leg stand back on the (upside down) saw and marked the position of the slots in the runners where I should drill holes to attach the saw.
I extended these marks along the wood and drilled holes about a middle finger length from the ends right through the wood and the leg stand. To position the nuts in the right place for the bolt being pushed through from above I had to balance the nut and a washer on my finger tip and push my finger into the runner as far as it would go. To aid this process I super-glued the washers to the nuts
With the saw attached to the leg stand I could turn the whole thing the right way up again
Making it Dust-proof
Now it was time to cover all the holes up to make the saw as dust-tight as possible. I covered this small hole with a thin strip of wood, painted black and epoxied in place
The biggest hole was where the old dust extraction hoses used to emerge
I marked out the outline of the hole on paper
..and cut a piece of 5 mm ply to match
I drilled two holes in the saw casing and through the ply to attached with machine screws
I epoxied the nuts to the ply to prevent them falling down the dust shoot when removing them in the future.
I painted it green to somewhat match the saw colour.
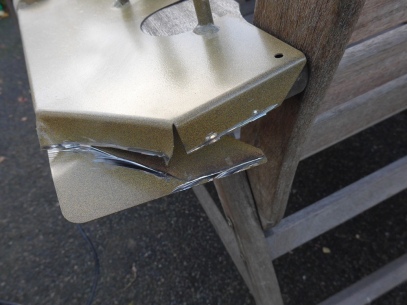
Removing the side panels on this saw has always been really tiresome. It entailed unscrewing 8 allen bolts, four of which were really awkwardly placed, and none of them ‘finger loose’. So I decided to change the holes into slots so that I would be able to remove the panels in future by just loosening the bolts and sliding the panels off, instead of having to remove all the bolts completely. I clamped the panels to a garden chair arm and used a 3″ cordless grinder to cut the metal
To improve dust-tight-ness, I made small blocks of wood and epoxied them over the holes at the bottom of each panel
.. and painted green
I further improved their dustproof-ness by gaffa-taping over the gaps at each corner of the panels
.. and by fitting draught excluder around the opening where the panel rests
Fitting the Shelf
I decided to fit a shelf below the saw to help support the dust pipe. I cut 2 pieces of 12 mm ply to fit, and marked where the dust pipe would go through it
.. and cut it out on the bandsaw
.. and sanded and painted it green as well
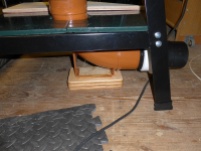
I had thought about suspending the rest bend from the shelf but decided to make a bracket that would go between it and the floor. I used 3 pieces of 12 mm ply laminated together, and a small piece of 9 mm ply to act as a guide.
Fitting the Power Inlet
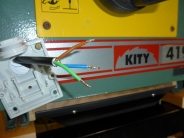
To obviate the need for the power cable to exit the saw through one of these panels I decided, for the sake of flexibility, to fit a 16A appliance inlet to the case. I drilled the required holes
.. then attached the connector
.. only to realise that I had forgotten to attach the base of the connector first! I disconnected the cable again, and while it was off I took the opportunity to solder the ends of the wires for a better connection
After bolting the base on, I fitted the cover
I cable-tied the cable inside to stop it flapping around inside the saw casing.
I made up a cable to fit (much longer than the original short one)
Fitting the Kill Switch
When using the Kity I would often find myself fumbling around under the table at the end of a cut for the OFF button. So I decided to make a ‘kill switch’ – basically just a paddle that can be tapped or knee’d to stop the saw. I found a suitable piece of scrap ply
.. sanded it to shape
.. painted it red and attached a hinge
.. and epoxied a bolt
.. drilled a hole in the saw casing above the on and off buttons
.. shaped a piece of wood to hit the OFF switch at the correct angle
..which I painted black, and attached to the lever, and then fitted the whole lot to the saw using a nyloc nut inside the casing to bolt it in place.
In testing, this works really well. It’s easy to sneak a finger under the lever to operate the ON button. The merest tap of the red lever stops the saw.
This article feels like it’s going on forever. I still have other ideas for the saw, including fitting wheels, but that will all have to wait for another post. See here
Hopefully all these mods will allow this saw to serve me well into the future.
Gallery
Click an image to enlarge and scroll through all images
Tools used
- 4½” Angle Grinder
- Cordless 3″ Angle Grinder
- 18v multi tool
- Surface planer (Jointer)
- Bandsaw
- 6″ Belt sander
- 9″ Disc sander
- Random orbit sander
- Drill press
- Router table
- ½” straight bit (router, for oak piece)
- 20 mm Forstner bit (drill press, for bolt recess)
- 8 mm drill bit (drill press, dowels)
- Cordless drill
- 10 mm and 14 mm ratchet ring spanners
- Allen keys
- Soldering iron
- Wire cutters
- Shop vac
- Various paint brushes (cleaning, painting)
- Scissors
- Pliers
- 300 mm rule
- Automatic Centre Punch
- 13 mm socket
- 120 grit belt (belt sander)
- Marples 18 mm bevel edge chisel
- Various clamps
- Permanent marker
- Measuring tape
Materials used
- 5 mm & 12 mm plywood
- Mahogany, Pine, Oak
- 4 off M8 x 40 mm set screw
- 2 off M5 x 20 mm panhead machine screw
- Rest Bend 110 mm 87.5°
- 2 off 110 mm push-fit pan connector
- Uhu K-2-Quick epoxy resin
- Araldite Repair (epoxy putty)
- Axminster Hobby Series TS-250M Leg Stand
- Axminster Big Mouth Dust Hood
- 16A 240V wall-mount appliance inlet
- Cable tie
- 4 off M3 x 30 mm panhead machine screw
- Superfine machine oil
- Lithium grease
- WD40
- Gorilla wood glue
- Super glue
- Gaffa tape
- Draught excluder
Things that worked well
- First time I’d used Araldite Repair (epoxy putty). Very impressed. It can be moulded to practically any shape and sets quite hard with 10-15 minutes. Excellent!
- I used my Parkside cordless 3″ angle grinder to open out the screw holes on the side panels. Like a knife through butter, as they say. Previously I would have done this with a hack saw, which would have taken ages.
Things that didn’t work (and improvements)
- Because I used the Axminster leg stand, my saw is now just under 2″ higher than it was. I prefer the original height. Probably if I were to do this project again I would keep the original leg stand and cut a hole in the top of it for the dust hood.
- I should have wound the arbour down to expose the inner blade guard bolts properly instead of struggling with a ratchet ring spanner. That would have saved me half an hour!
- Looking at the photos of the ‘kill switch’ while writing this, I’ve had an idea – I could cut a large hole in the lever just above the black block to give direct access to the ON button. Then I could start the saw with a thumb or finger through the hole!
- I need to shape and paint the pieces of wood between the saw and the leg stand – they look temporary.























Hi, Im impressed with your modifications. I have a similar sawed I am struggling to get the blade parallel with then mitre slots… Have you done this and if so, what was your method?
LikeLike
Hi Chris. Thanks for your comment. It’s a while ago, but I must have adjusted the parallelism of the blade when I put the top back on. On the Kity you do this by loosening the pairs allen bolts on the table top. You must adjust it with the blade not locked on the handwheel. I’ve just found the following on UKworkshop.co.uk (hope it helps):
1) remove sides and sliding table runners
2) unlock the tilt adjust and observe the arbor/motor assembly find its equilibrium at somewhere around 25/30 degrees.
3) wedge a length of 2×4 under the plate on the blade side of the motor assembly (so it passes under the motor and returns the tilt to the 90 degree position
with the other end of the 4×2 length poking out of the saw side, clamp it down to the base/legs
4) now the saw is untensioned and square, loosen all 4 of the hex bolts used to adjust the blade.
5) mark a tooth and with the mitre gauge offer up a stick to the tooth at the fron t of the blade.
6) slide the mitre gauge the rear, rotate the blade and re-check the marked tooth
7) adjust the parallelism of he blade by LIGHTLY tightening one bolt at the back and one at the front then:
8) then using a rubber mattet and wooden blocks, move the front or rear of the motor/arbor assembly as required.
9) retighten all 4 adjusting bolts and check blade square again
10) re-assemble machine and re-check
Cheers
LikeLike
Thanks loads for this! Its been really useful. I’m currently adding a dust hood to my Axminster ts-250.
LikeLike
Thanks for your comment. I’m glad it’s helped you and good luck with your conversion.
LikeLiked by 1 person