
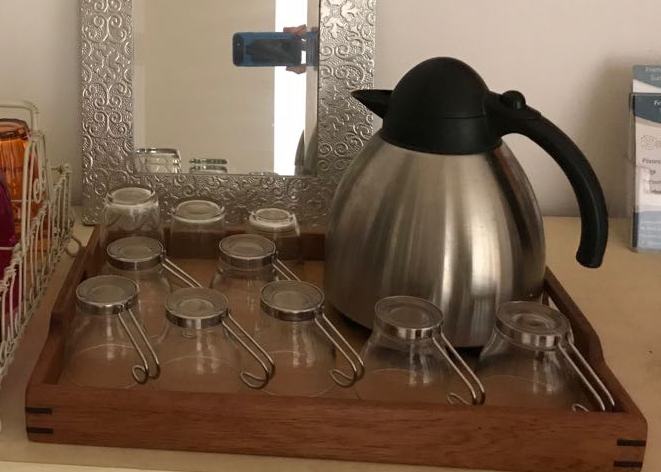
After looking at various serving trays for inspiration but not really finding exactly what I was after, I pretty-much created this one by making it up as I went along. All I really knew was that it was to be 15″ x 10″ (roughly). I chose African Mahogany for the sides and I wanted a contrasting wood for the base. I would like to have used 6mm ply for the base but happened to have a flat piece of 9mm lying around so I used that.

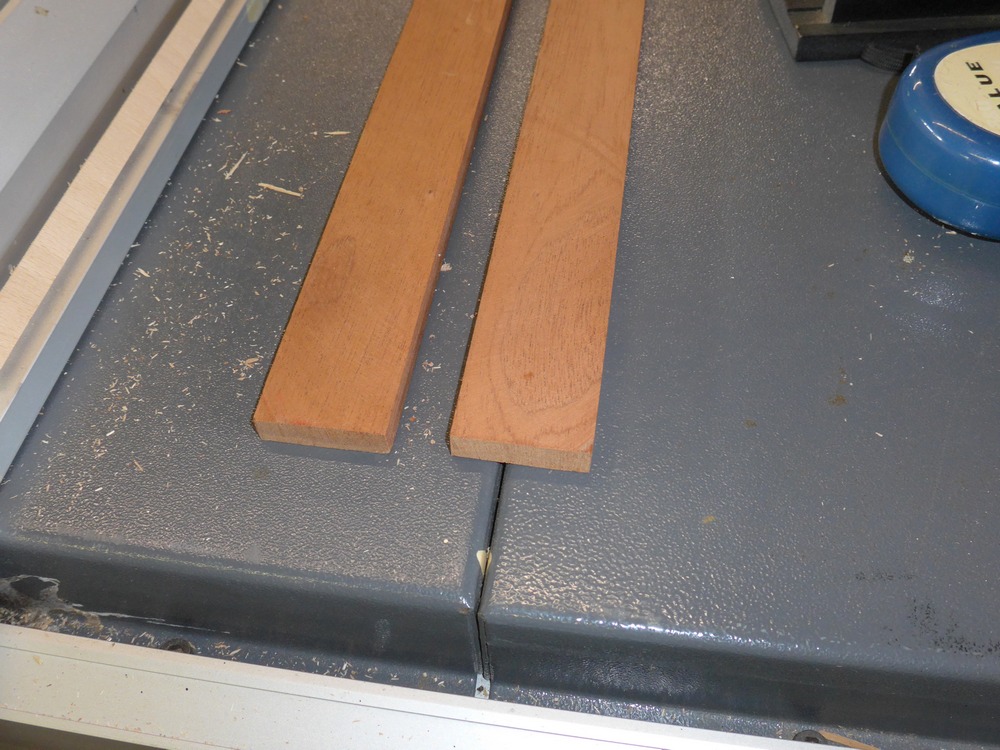
After planing one edge flat and then another edge square on the planer/thicknesser, I ripped the 50mm square mahogany into 10mm strips using the table saw.
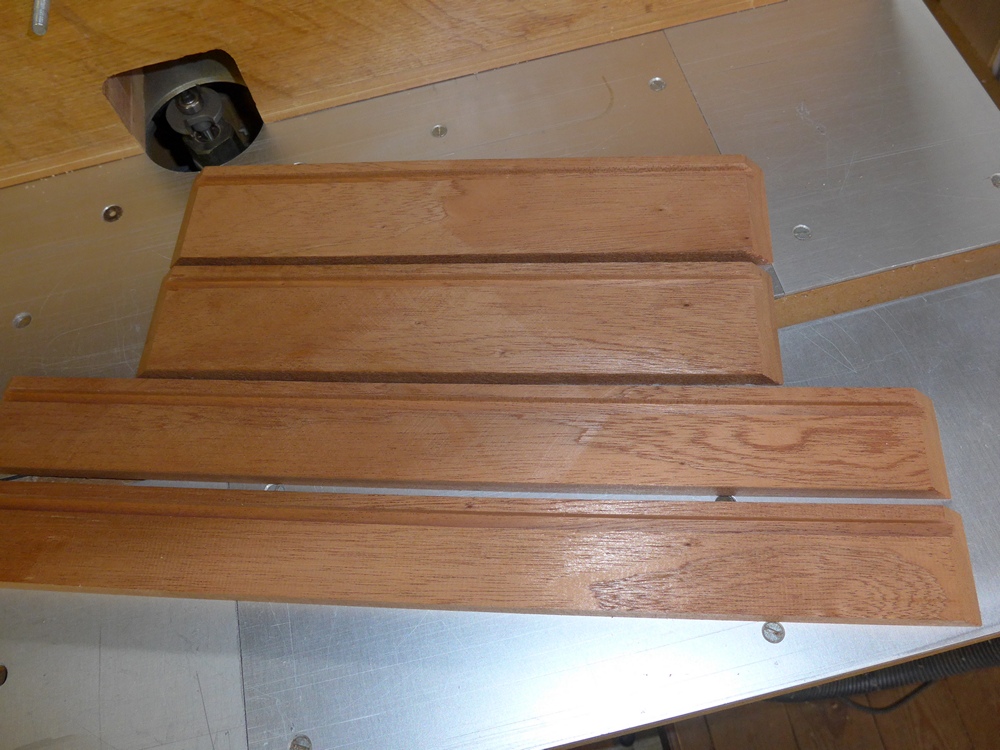
Then I ripped two of the pieces to 40mm wide, and left the other two at 50mm for the ends of the tray.
I then cut the pieces to length with a 45° mitre on each end and then used the router table to rout a groove in each piece to take the rebated base.

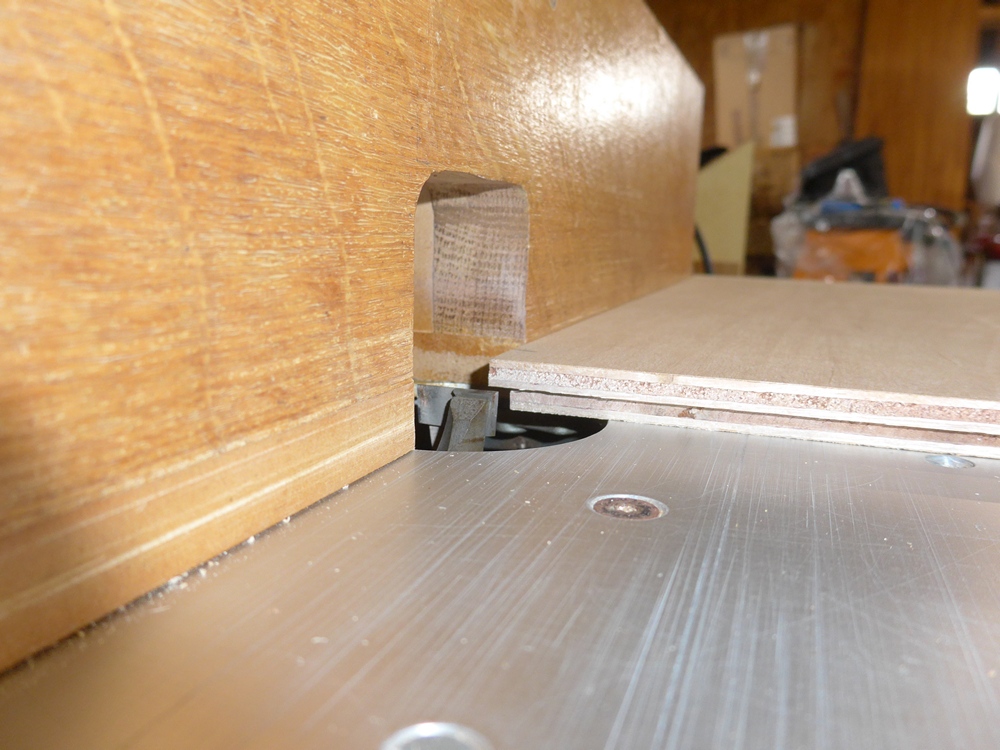
I cut the base to size using the table saw and routed a rebate (rabbet) around the edges. If I had used 6mm ply as originally intended, the whole thickness of the base could have rested in the grooves. But the 9mm was too thick to do that because it would have made the inside of the tray too shallow. Really I had made things more difficult for myself by using the 9mm.

The base was a tight fit in the grooves. I test-fitted the parts together. At this stage the ends were still 10mm taller than the sides.

Next it was time to cut the handles in the end pieces. This was the only bit I put any effort into actually designing. I used SketchUp to help me decide the dimensions and position of the handles

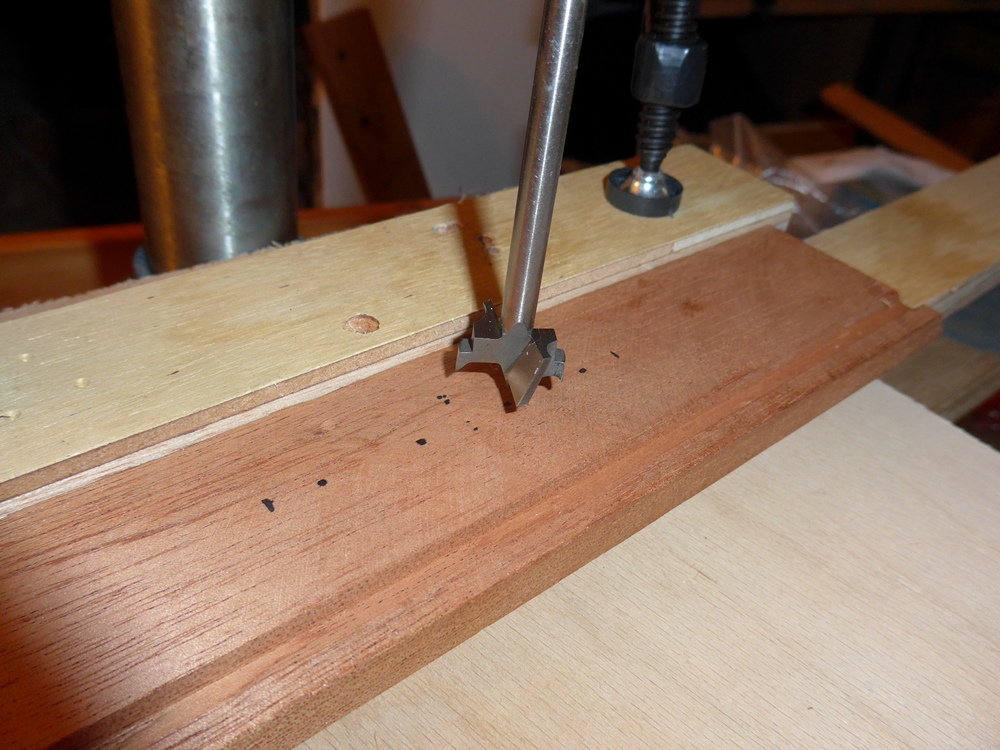
The handles would be 20mm x 80mm and 10mm from the top. So I started by drilling four 20mm holes using a fence on the drillpress to ensure they were all the same distance from the edge

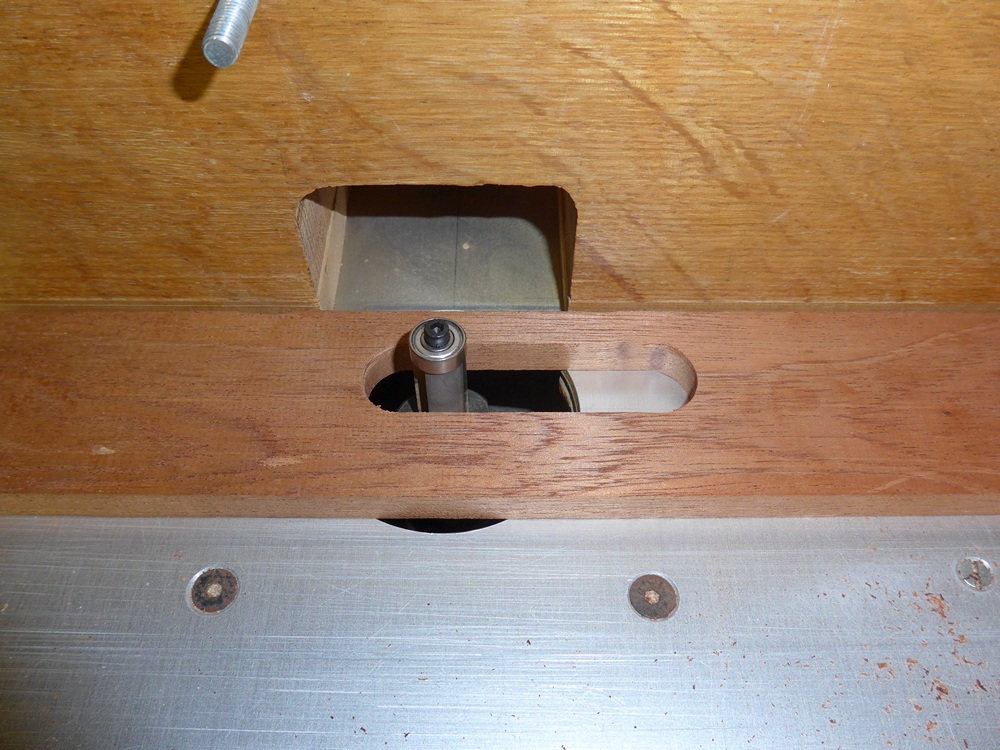
Then I used the router table to elongate the holes. I attached stop-blocks to the fence to limit the start and finish positions of the cut so that the router bit would line up with the centre of each end hole at each end of the cut. Then set the fence so that the bit was just touching the inside of the hole at the point nearest me. Then it was just a case of making sure the 12mm bit was clear of the wood before starting the router, and then moving the wood against the fence and sliding between right and left stop-blocks. Bloody hell, that’s difficult to explain in words – maybe I should start doing YouTube videos!
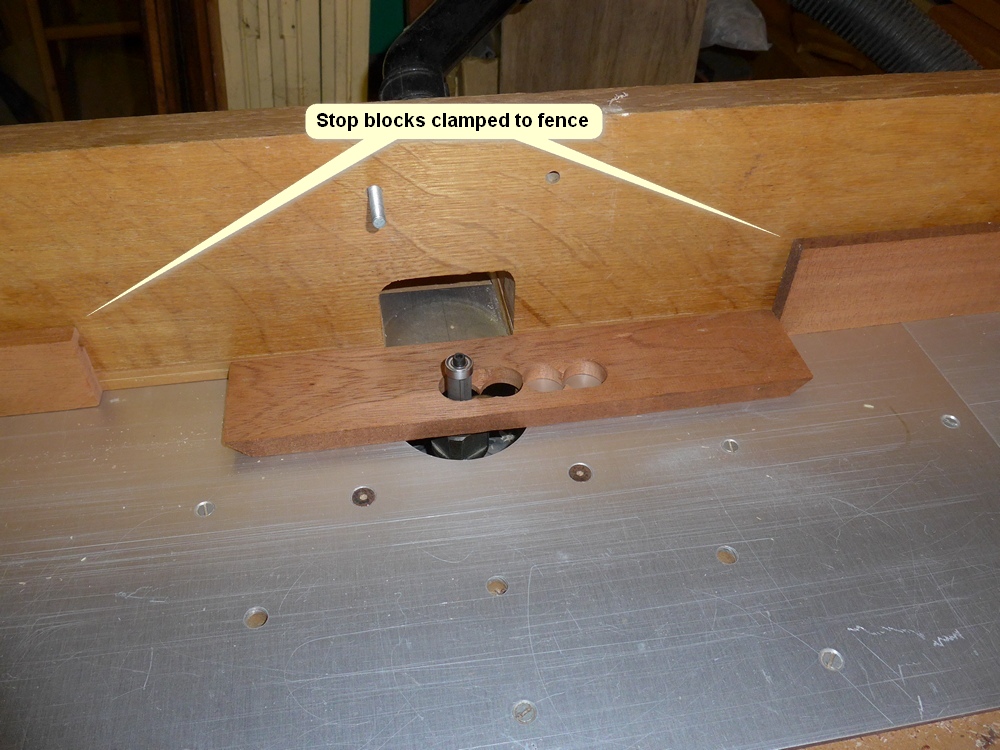
The fence had to be adjusted when it came to doing the other side of the handle.
I cut the unwanted bits out of the ends using the bandsaw

And created internal and external radii using the spindle sander fitted with a 13mm spindle.

Then it was back to the router table to round over all the edges using a 1/8″ radius round-over bit

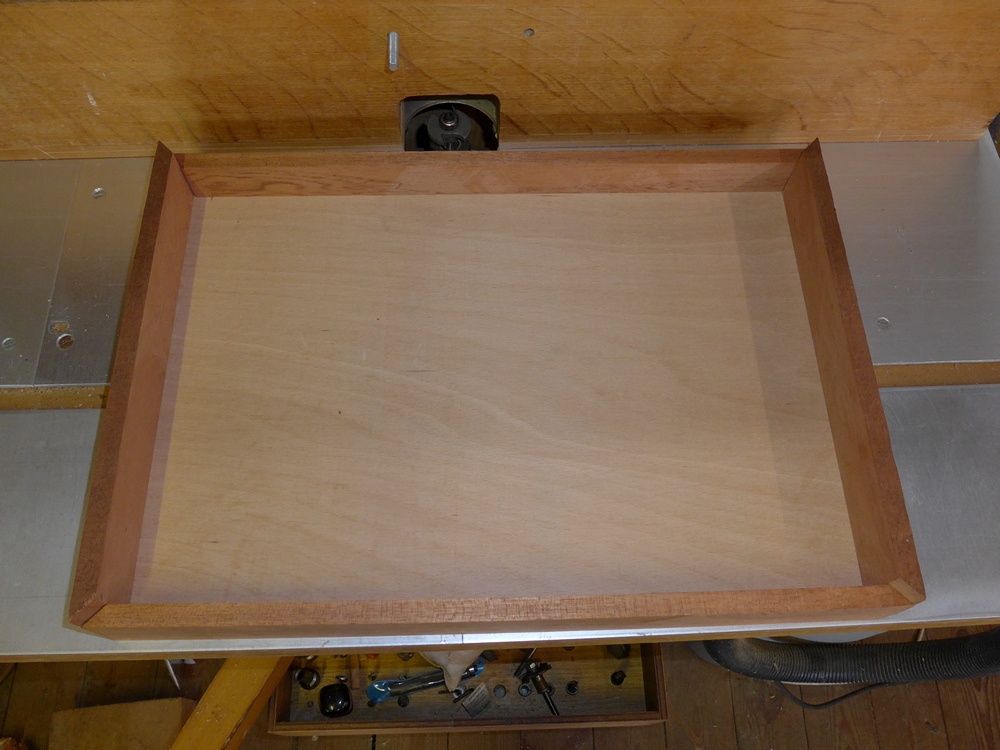
And then time to sand all the pieces smooth and check with a final dry fit

The next stage was the glue-up but I forgot to take pictures – doh! I used two new (to me) techniques. I used masking tape to stop glue leaking onto the wood in the internal corners (which would have been very difficult to clean up later) and I used masking tape wrapped around the outside of each corner to hold the mitres together – I used no clamps at all during glue up! Next time I’ll make sure I get photos.
After the glue-up there was a small amount of planing required to level the sides where they met at the corners. The ad-hoc way I had shaped the ends had resulted in slight differences in height between the sides and the end pieces. I used a block plane.
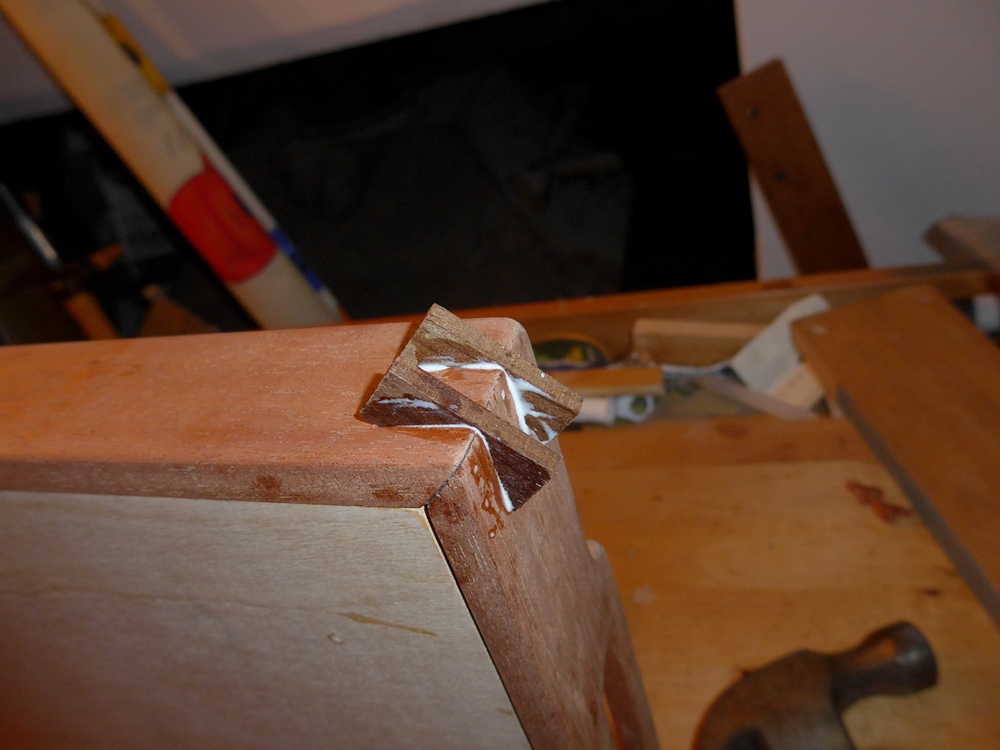
The last thing to do was to fit splines across the mitres, both as a decorative element and to substantially strengthen what would otherwise be a weak joint. This jig (that I’d made nearly thirty years ago!) held each corner of the tray at 45° while I ran it along the router table fence past a 6mm slot-cutting bit.


I chose to use a darker contrasting wood for the splines. I was thinking of Walnut but decided to try some Thermally Modified Tulipwood (American Poplar) that I had bought some time ago. ‘Thermally modified’ means the wood has been cooked in an oven, giving it some desirable qualities such as making it more rot-resistant. When discussing this wood at the timber yard, the guy said that when you cut it you can smell a sort of burnt wood smell. I now know what he meant. I cut the splines on the band saw and I found the dust quite irritating to my throat and eyes. I put a mask on for most of the time. The smell was not a pleasant one. I dry-fitted the splines. They were a good tight fit.
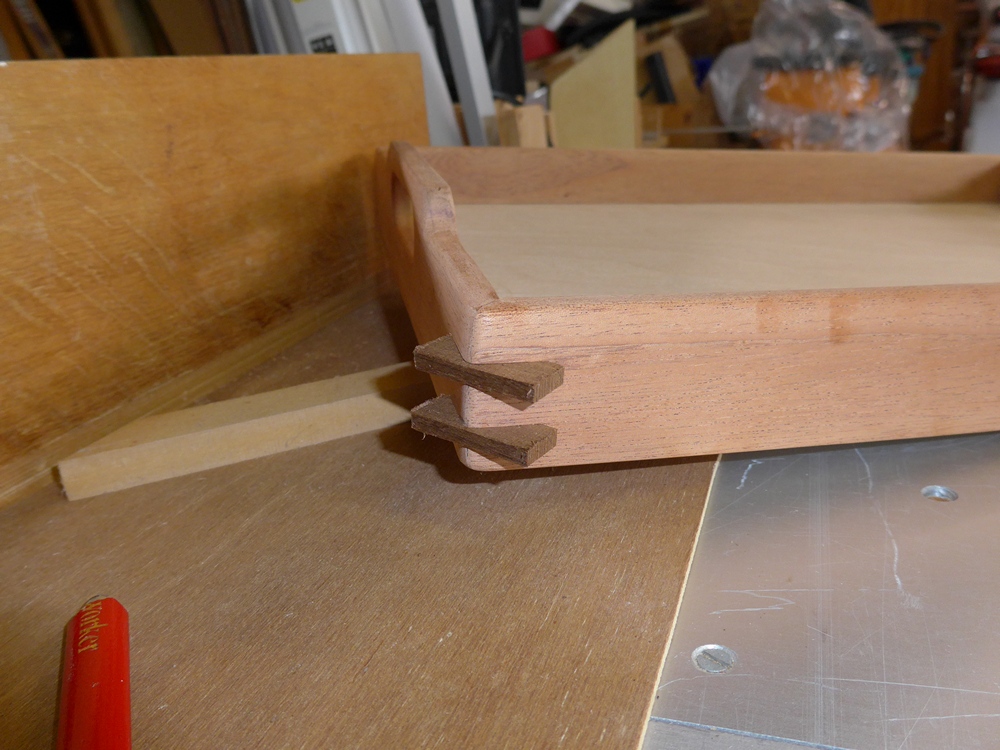
With the help of a hammer I glued and tapped them into the slots. I wasn’t worried about glue squeeze-out here because it would be sanded smooth later
I removed most of the protruding waste using the bandsaw, which just happened to have a fine-toothed blade fitted
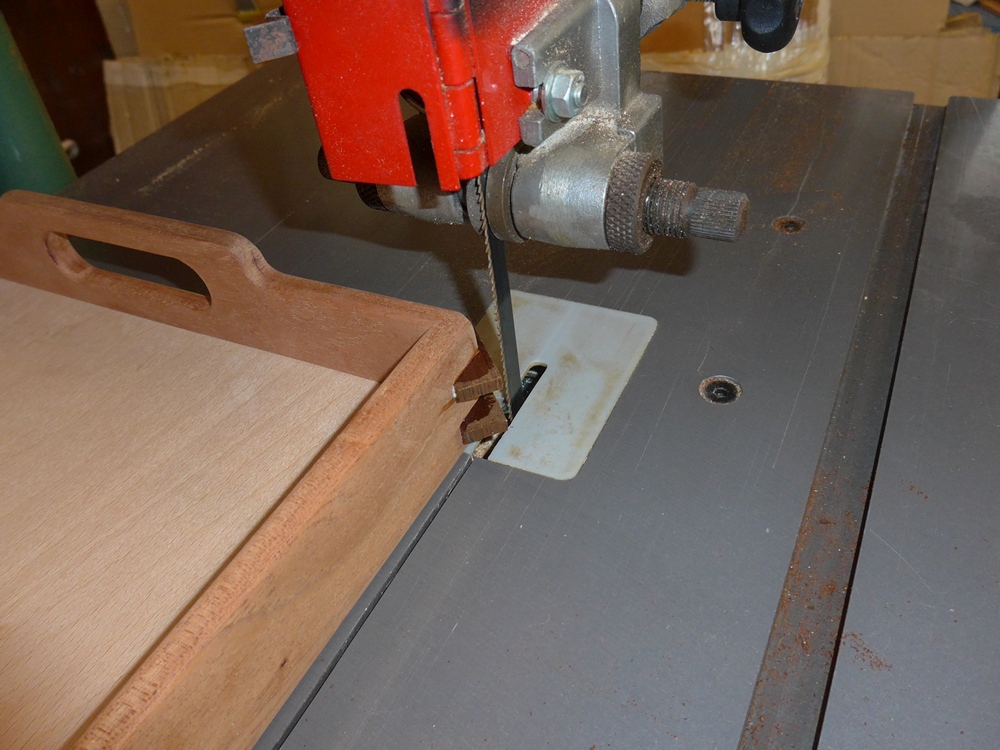

This left a small amount still proud of the surface

I smoothed the remainder down using the belt sander, and then finished off with the random orbit sander

To finish the tray I used three coats of Danish Oil followed by beeswax.
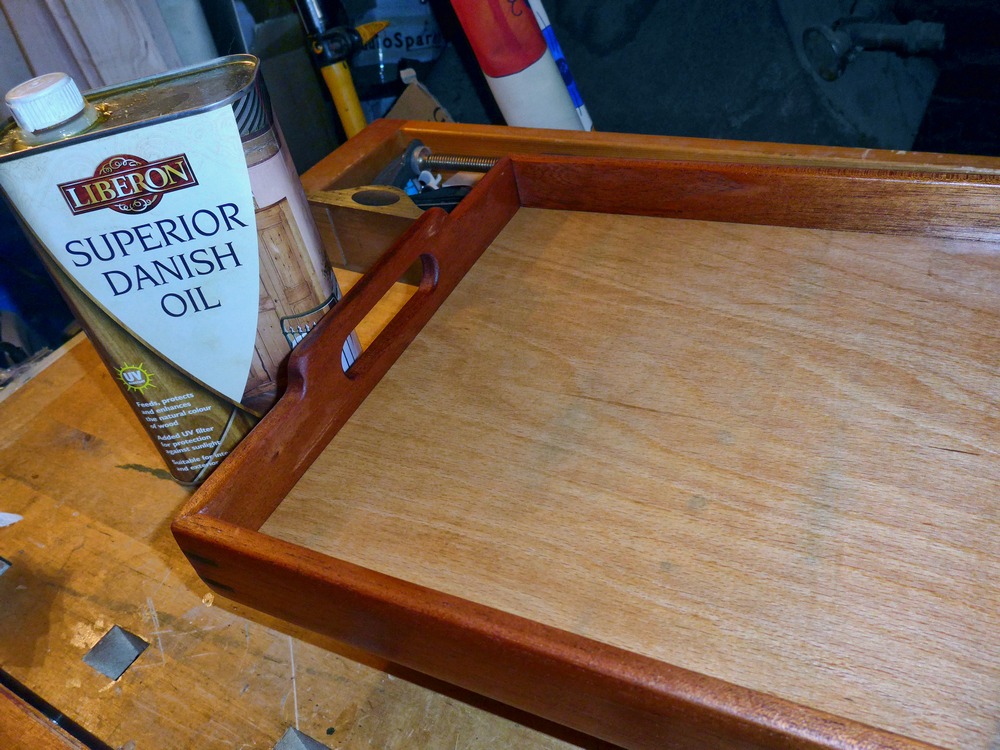
Polyurethane would have been a tougher finish, especially with hot water involved once the tray was put to use
Tools used
- Table saw
- Surface Planer (Jointer)
- Bandsaw
- 6″ Belt sander
- Spindle sander (or bobbin sander)
- Random-orbit sander
- Router table
- Drill Press
- 1/8″ Round-over bit (router)
- 6mm slot-cutting bit (router)
- 12mm straight bit (router)
- 20mm straight bit (router)
- 20mm forstner bit (drill press)
- 120 grit belt (belt sander)
- 180 grit and 320 grit discs (RO sander)
- Stanley Block Plane No. 60-1/2
- Hammer
- Spline jig
- Various clamps
- SketchUp 3-d modelling software
Materials used
- African mahogany
- Beech(I think)-faced plywood, 9mm
- Thermally-modified Tulipwood
- Danish oil
- Beeswax
- Masking tape
- Gorilla wood glue
Things learned
- Thermally-modified wood (or at least TM Tulipwood) is not nice to work with
- Masking tape works well to prevent glue squeeze-out marking the wood
- Masking tape works well to pull the parts of a mitre joint together while glue dries
- The small bottle (118ml) of Gorilla Wood Glue is much easier to use than either of the larger ones (532ml and 236ml). The plastic on the large round ones is too stiff. The smaller one is lighter, less tiring and allows much more control over the application of glue.

Gallery


