
How to turn old doors into a family heirloom
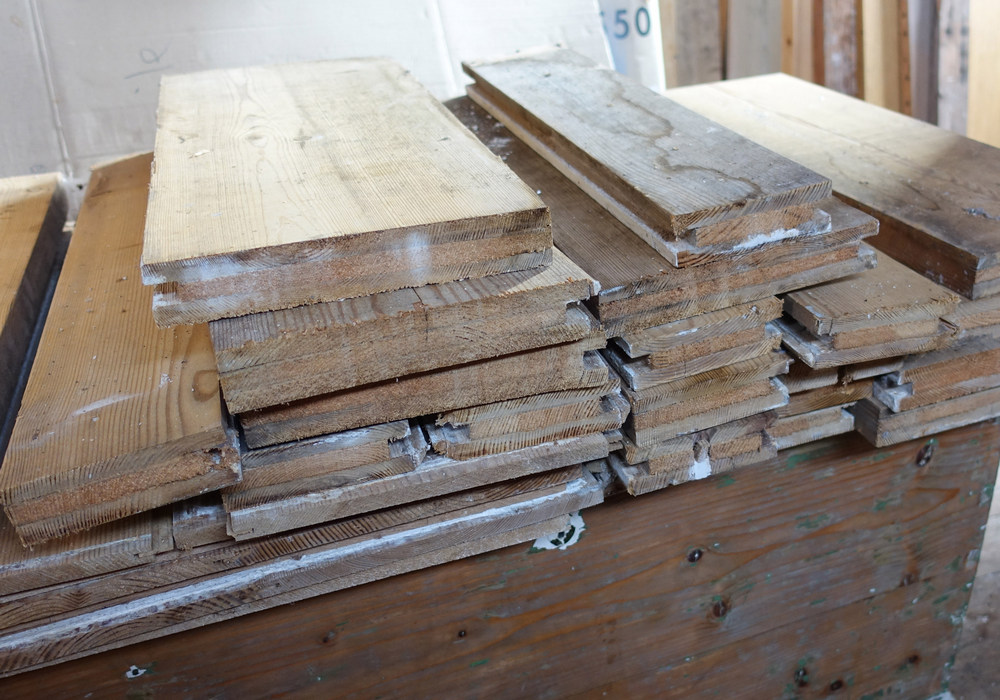
This project started with the aquisition of some old pine, courtesy of some “Victorian pine doors” I picked up off Freecycle.

My dad helped remove the door furniture and sawed them apart using a cordless jigsaw.
They yielded lengths of 35mm pine and many large panels about 12mm thick. In Victorian times that would be 1½” and ½” respectively.

Judging by the cast iron rising-butt hinges, other hardware, the style, size and construction of the doors, they were indeed well over 100 years old. The pine was absolutely amazing and of a quality I just wouldn’t be able to get, these days.
That was back in April. It took until early December before I came to select the pieces for this project.
I made the ends of the chest first as it was easier to find the shorter lengths required for that
I cut the rough ends off on the RAS.


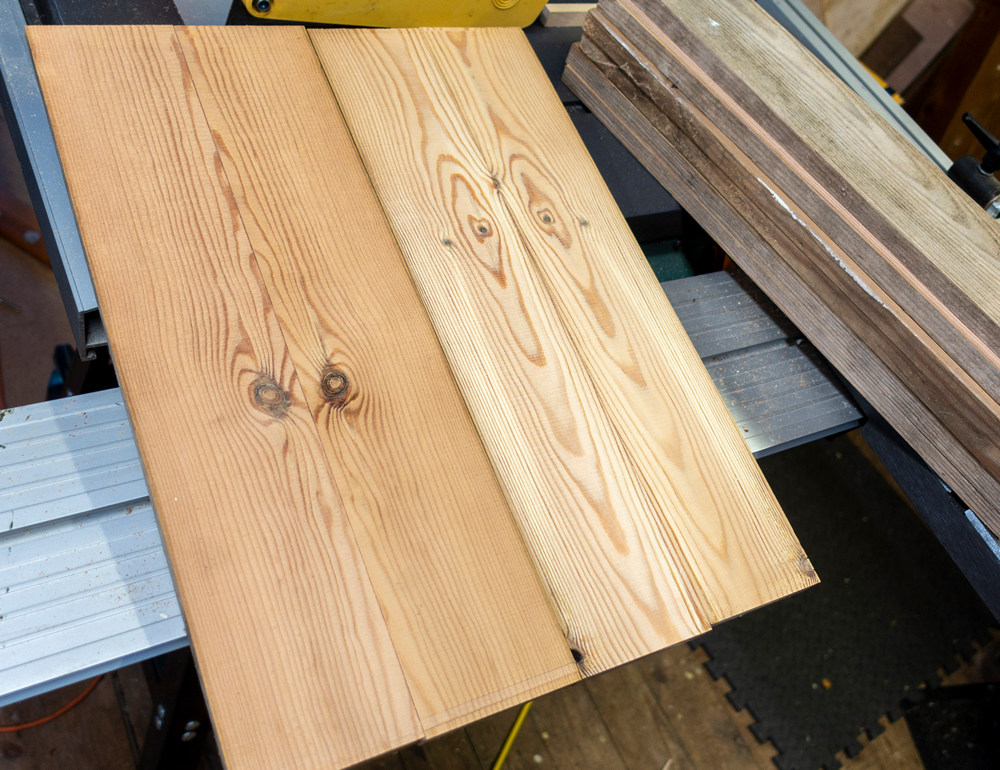
Look at that beautiful pine! The heartwood is seeing the light of day for the first time in probably 200 years. That’s 60 years of growth in that photo. Of course you could argue that the internal elements of the wood have never seen the light of day ever, until you come to machine it. But the smell that has been locked-in for two centuries is lovely.
At the bandsaw I ripped off those parts of the wood I couldn’t use, like the tongues and grooves.

This left me with relatively ‘clean’ wood.
I had to remove various stickers, bits of blu-tack and bubble gum. One door had “Sophie’s Room” written in chalk.
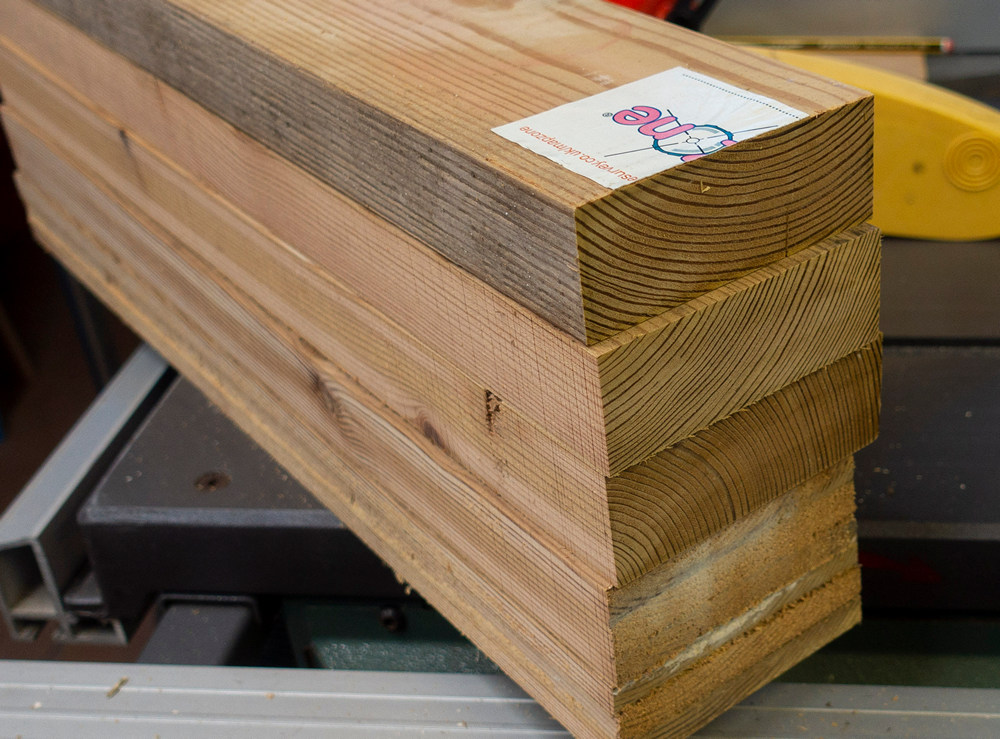
With the wood being so thick, I was able to resaw down the middle, and still end up with 15mm thick, after final machining and sanding.


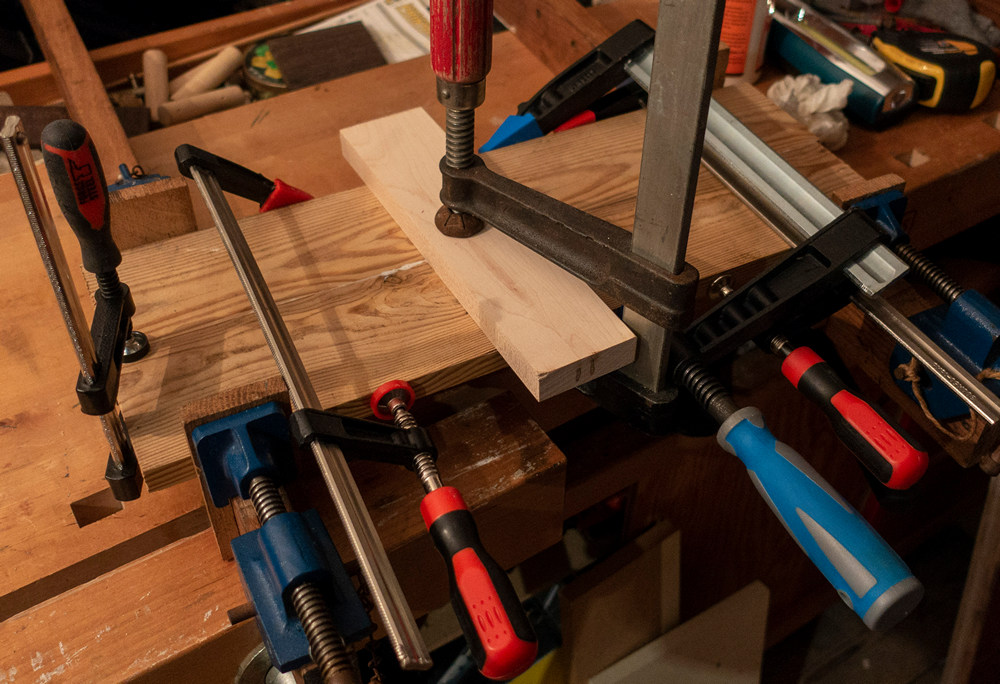
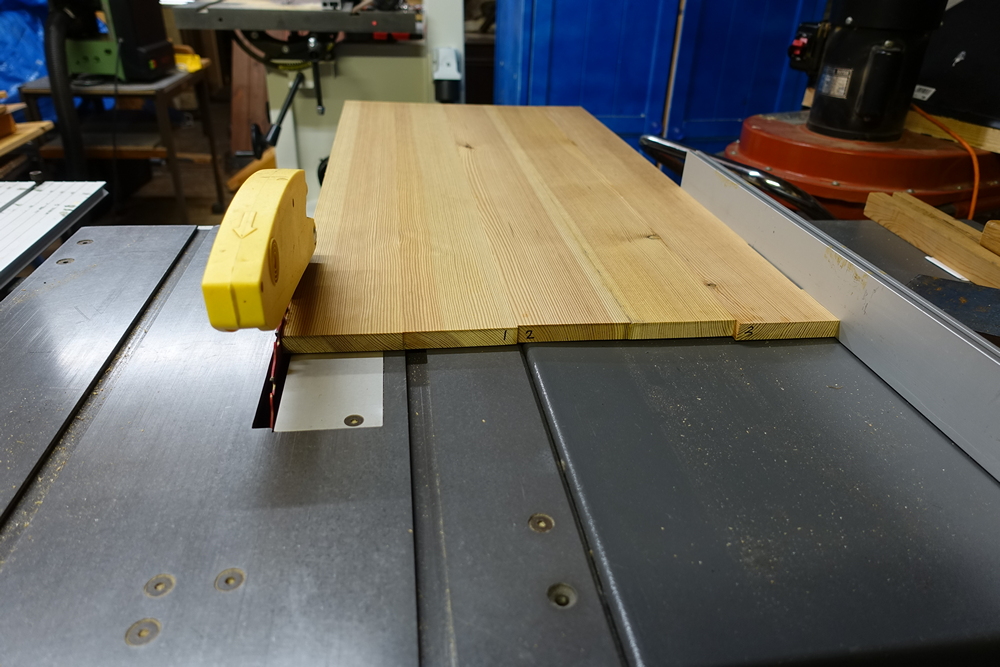
The width of the panels, once glued, would be 18″; too big to fit through my thicknesser. So I decided to glue them up in pairs first, after jointing the edges but leaving the faces rough cut. The 18″ would be made up from 5 boards. First I matched pairs.
Then glued up pairs
and ran them through the thicknesser

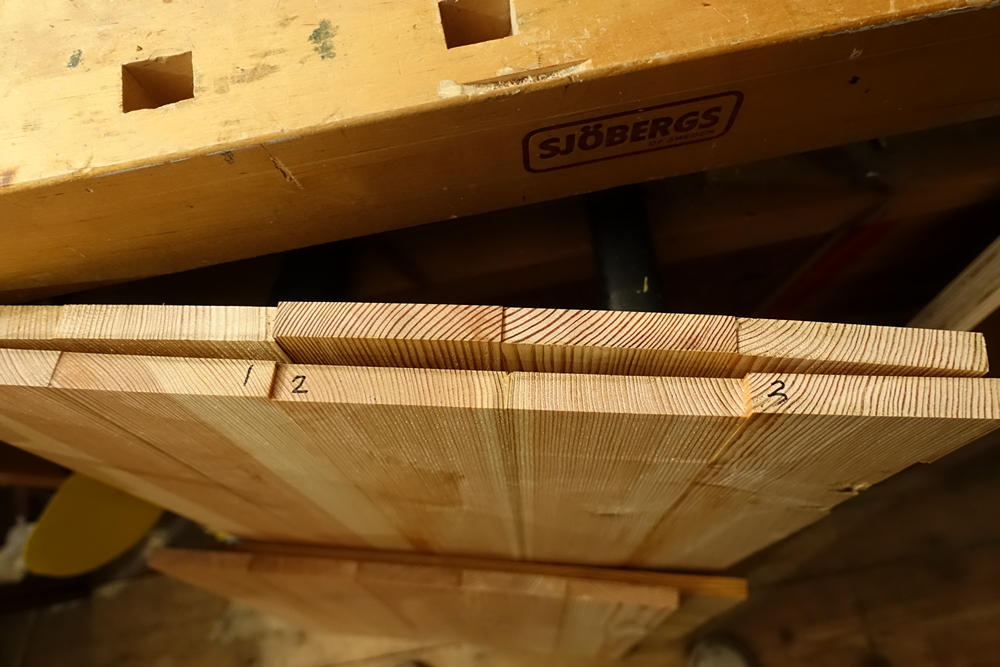
After which I had 4 glued up pairs and 2 individual boards

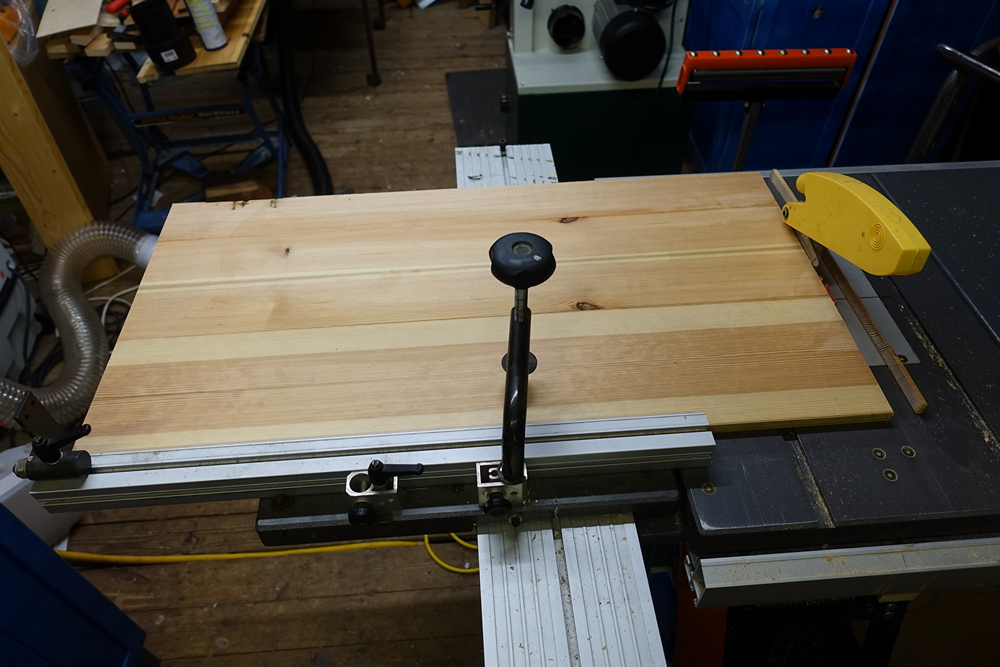
Each end would be made of 2 doubles and a single, which I arranged and marked.

And then glued up to make the complete end panel, trying to keep the joints as flat as possible because it would no longer fit through the thicknesser.

With the end pieces made I turned to the longer front and back parts. Again 18″ wide, made from five boards using exactly the same method. The difficulty was finding pieces long enough that were clear of mortices, etc from the joints, locks and hinges that had been fitted to the doors. In a couple of cases there were some ‘rough’ parts that I tried to hide in or under the finished chest.
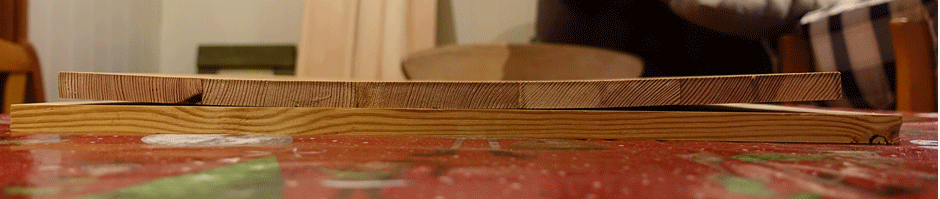
While moving the glued up panels from house to workshop, the boards cupped visibly, due to the change in humidity.
This surprised me because most of the wood is quarter-sawn (ie the end-grain is running almost vertically) which should result in very little movement. I had another theory – one side of these panels has been freshly cut whereas the other side is the same surface that’s been exposed to the world, either directly or under a layer of paint, etc, so maybe the pores on that side of the wood are less open than those on the cut side. I did an experiment – I dampened the concave side using a wet kitchen towel.
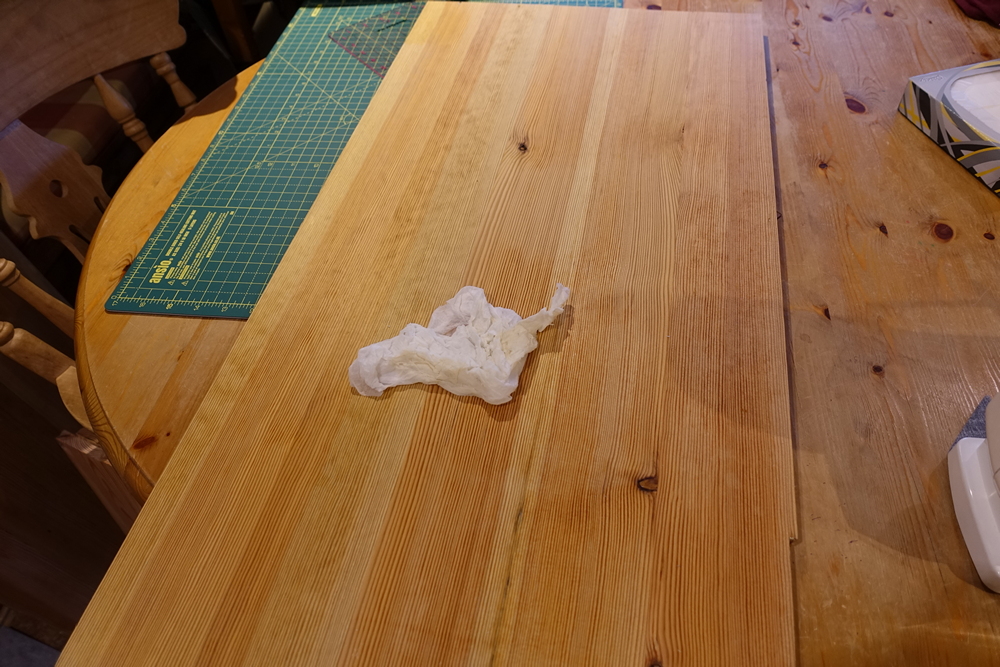
Sure enough, after a surprisingly short while, the boards flattened out again

I did a time-lapse photo to show the effect. In the animation below, the frames are 5 minutes apart, so the whole process was less than an hour
With the boards flat, I ripped to final width
And squared the ends
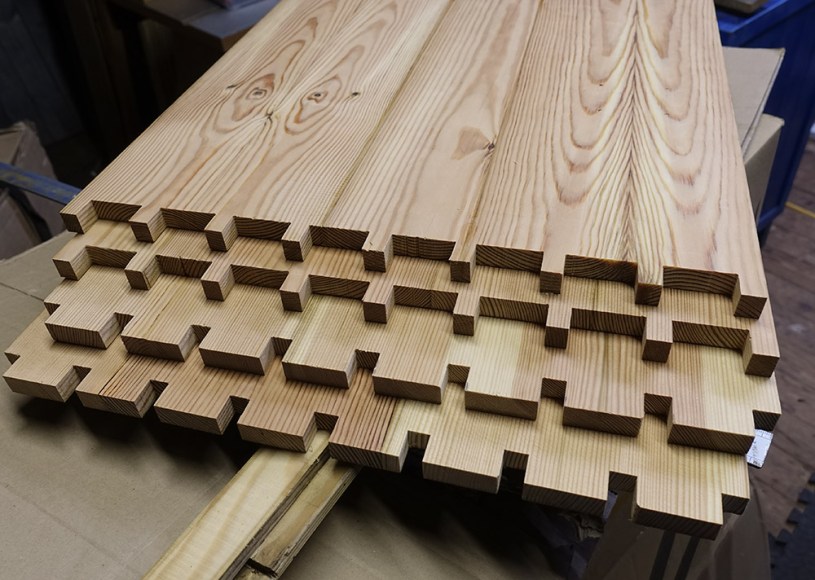
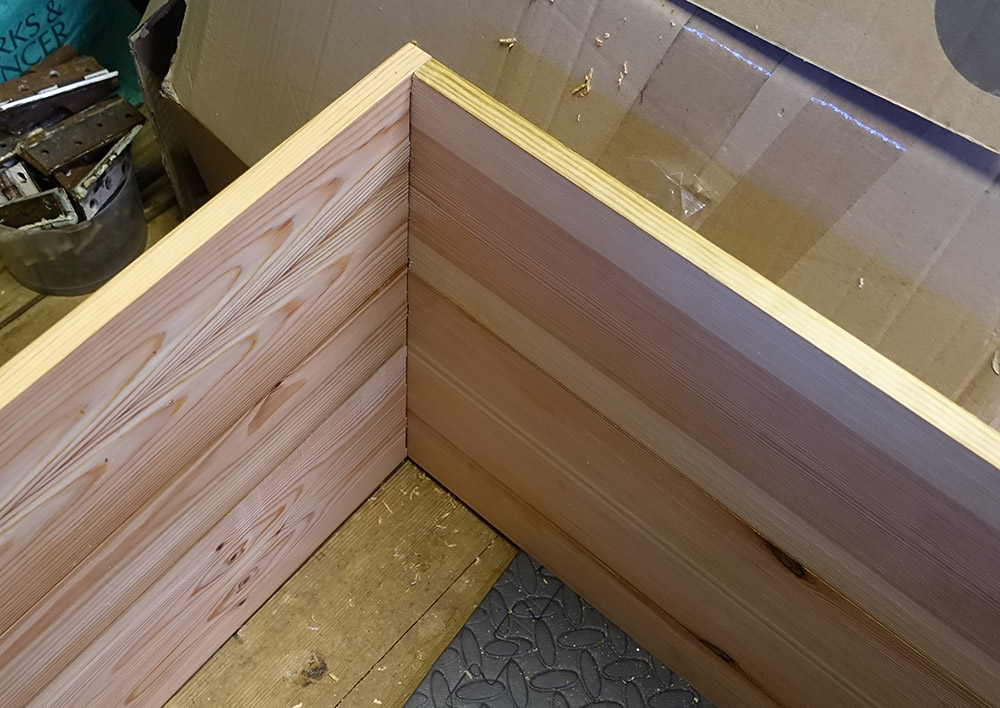
The traditional joint to use for the corners of a blanket chest is, of course, the dovetail. In all the woodworking I’ve done, I’ve still yet to cut a dovetail joint. At least not since the ones I hand-cut at school, more than 40 years ago. I will certainly try some soon, but now was not the time. I decided to use ‘uneven’ box joints. That would at least give the appearance of dovetails when viewd from the front.
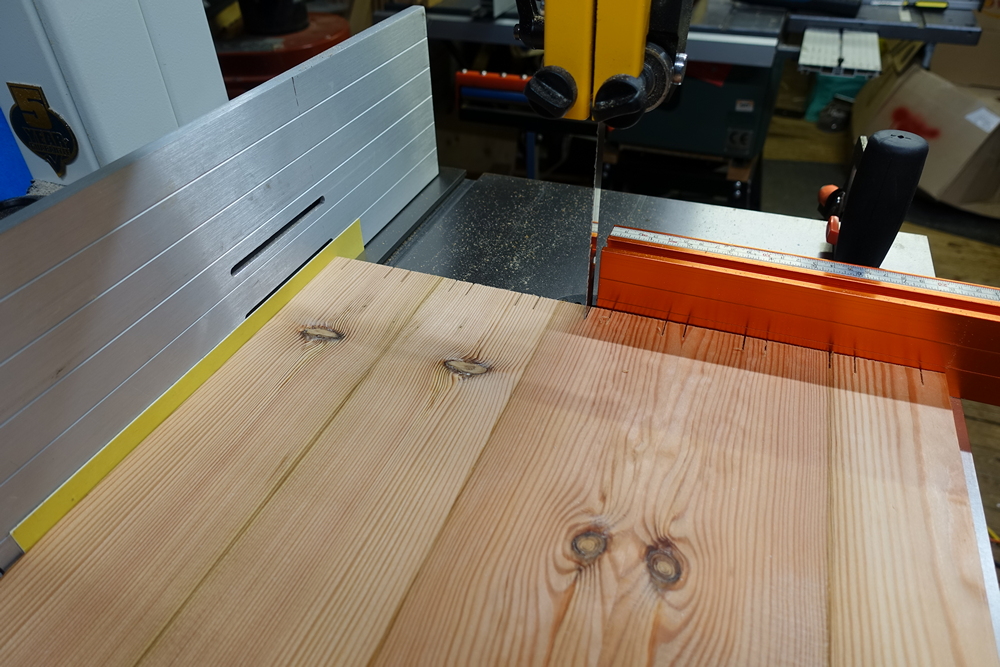
In 2018 I designed and built a box-joint jig for my tablesaw, but that can only handle stock up to about 12″ wide, so I couldn’t use it for this project. Recently, I designed and tested a method to cut variably-spaced box joints on the bandsaw using just one device – namely a plastic ruler to which I had stuck layers of masking tape sufficient to bring the thickness up to the width of the saw kerf of my bandsaw blade. The final optimum thickness was determined through trial and error.
The advantage of my new method is that it requires very little set-up and you can roughly mark by eye where you want the box joint fingers to go and how wide they are. There is no accuracy required at this stage. The plastic ruler ensures that each saw cut is offset by the correct amount.
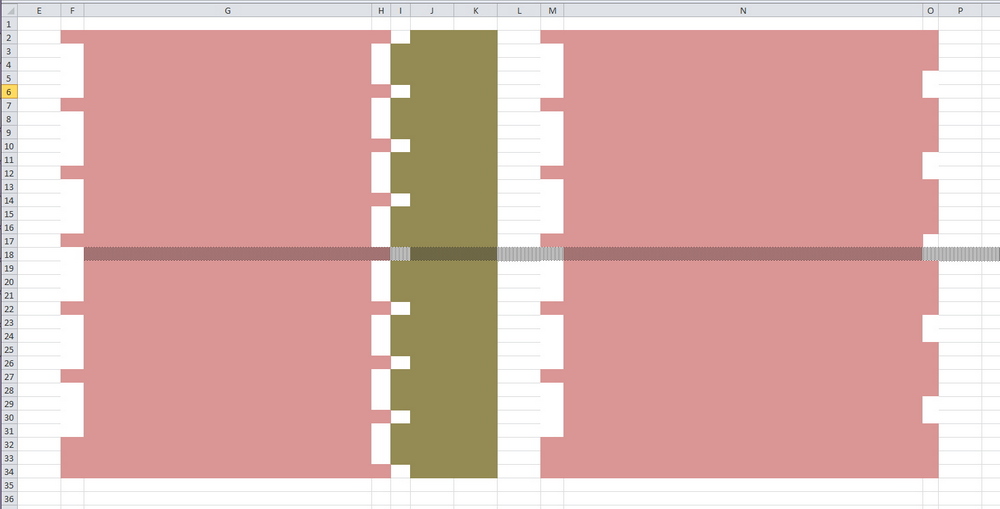
I used Excel to try out different joint spacings to see the visual effect. I settled for eight large ‘pins’. The large pins would be cut on the front and back of the box to reduce the amount of endgrain showing from the front.
The throat of my bandsaw is just under 14″, so I wouldn’t be able to fit the whole board under it to cut the joints on one face. But I realised that I could flip the boards and cut from either side towards the centre with no loss of accuracy. This entailed a handling sequence complex enough to require a print-out of the ‘algorithm’ to refer to as I was cutting the joints!

It was much more complicated than any flat-pack wardrobe instructions!
First I cut all the slots, using the procedure above, and using my mitre fence to limit the depth of the cuts
Then I hogged out the wood between the saw cuts to form the pins. This was very slow to do on a bandsaw. A router would have been much quicker, or the table saw.

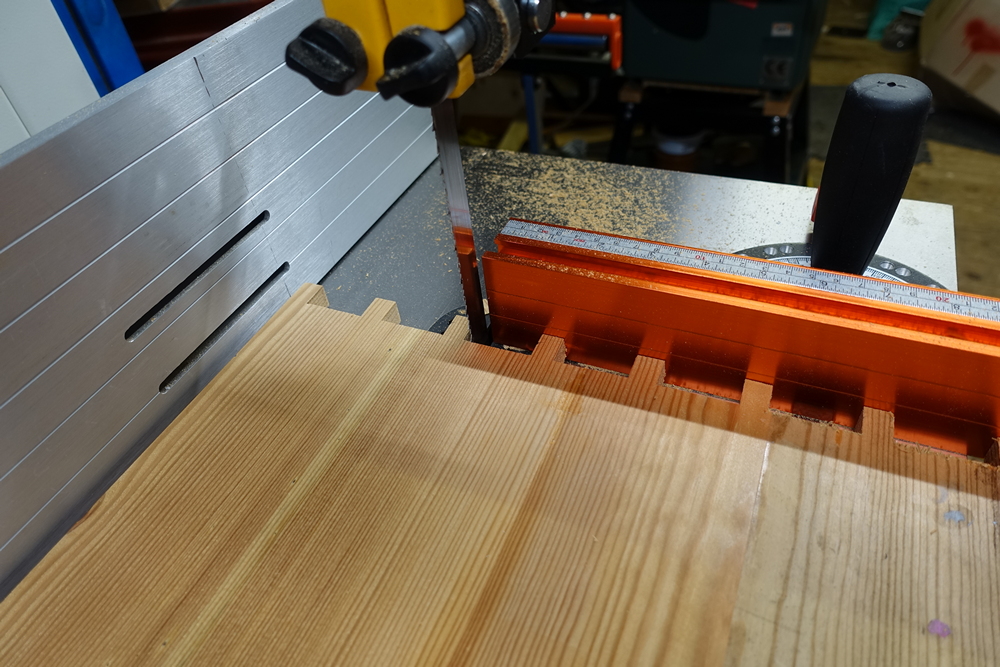
It took me well over an hour to do all 8 ends. Then I cleaned up the cuts and tested the fit

There were some rough edges that I could have prevented had I used a zero-clearance insert or a backing piece below the work when sawing. But it was quite easy to clean up


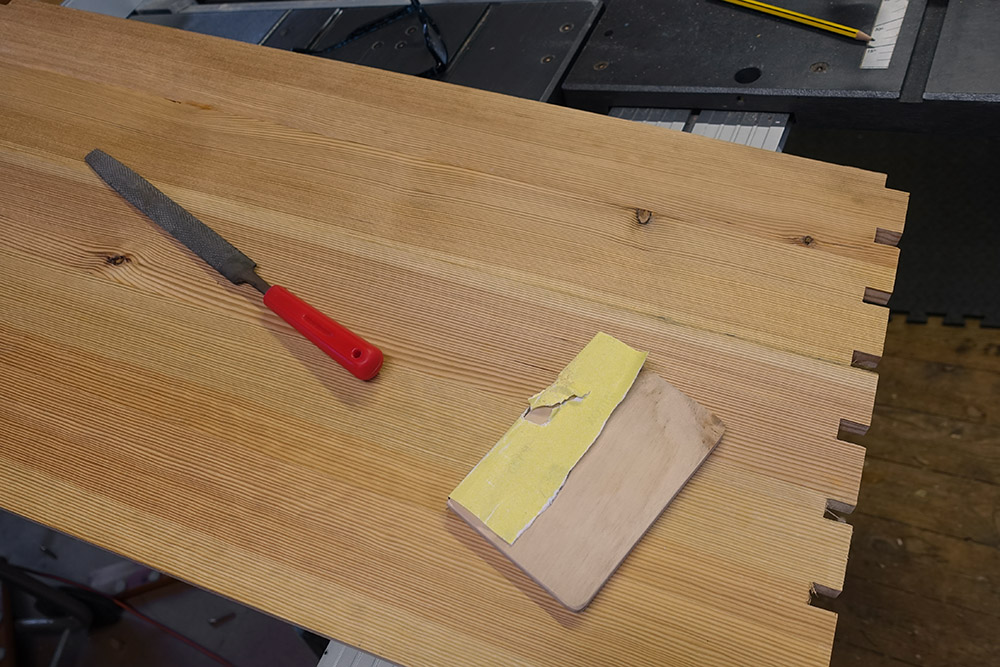
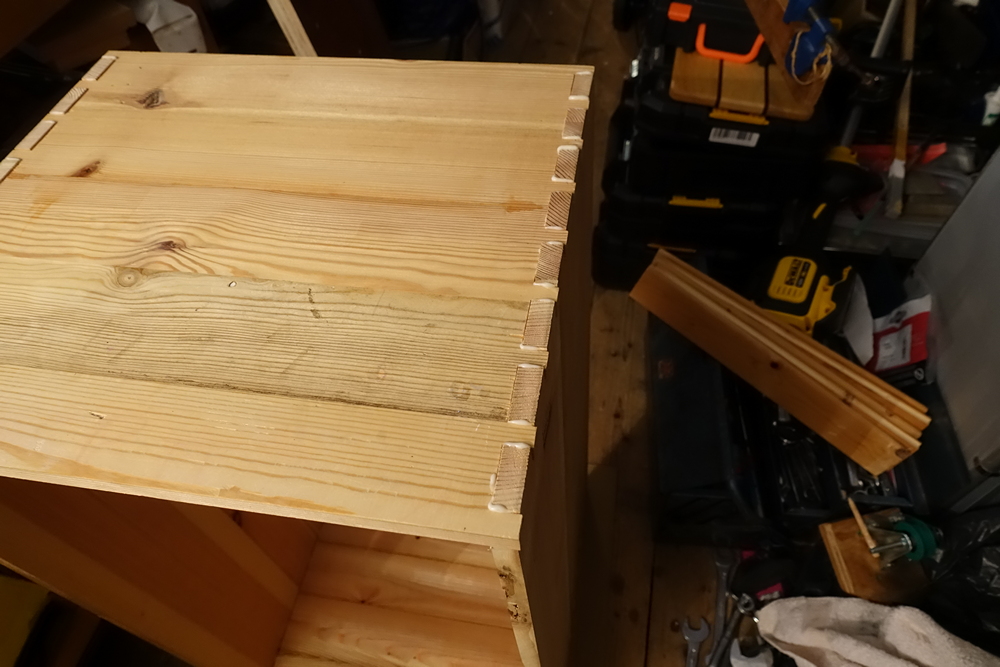
The joints were a very tight fit. In a way, that’s good, but they were too tight. I eased the fit using a rasp.


With the joints being tight and with so many glue surfaces (64 pins in total, each with three glue surfaces), there was no way I was going to use a PVA or Aliphatic Resin glue because the ‘open times’ of those glues is too short. I wanted a glue that would allow me time to adjust all the pieces without having to panic. So I mixed up some Cascamite (a synthetic, urea-formaldehyde glue).
The cure time of Cascamite is supposed to be 6 hours, but in fact it took until the next day before the remaining glue in the jar had set solid. I applied it using a glue brush
I needed eight sash cramps for this glue-up but only had six, so I made up another pair using some cramp heads that had been in a box for the past thirty years, and a new set I just bought.
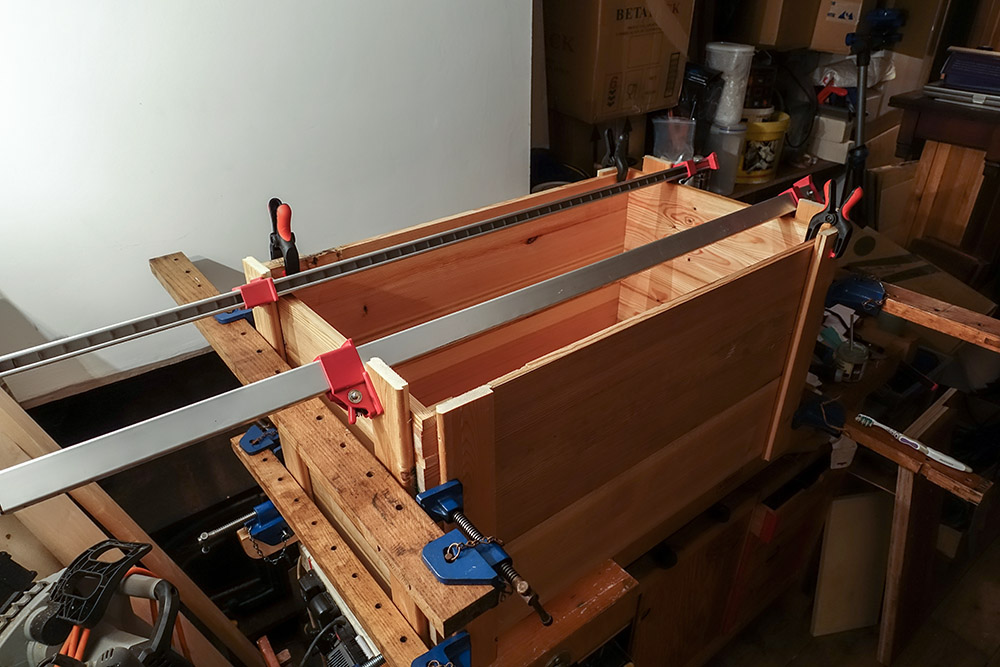


Check for square and adjust if necessary.
The glue took nearly 18 hours to fully cure. Still I would rather have that than a rushed glue-up.
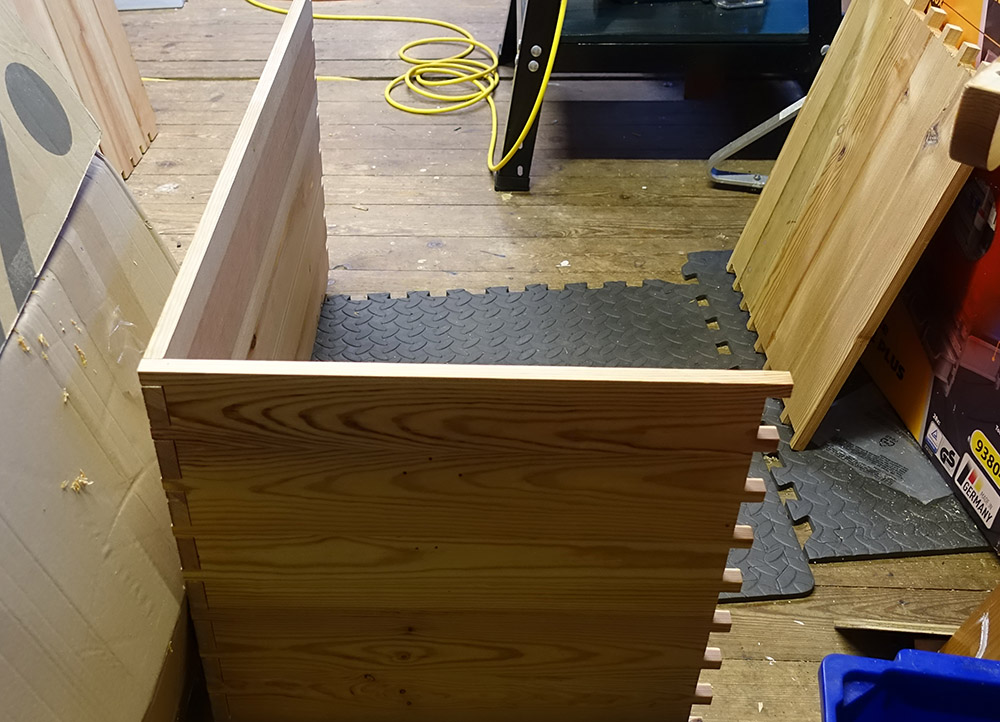
Once the clamps were off I could trim off the protruding pins

I switched from my block plane to my smoothing plane
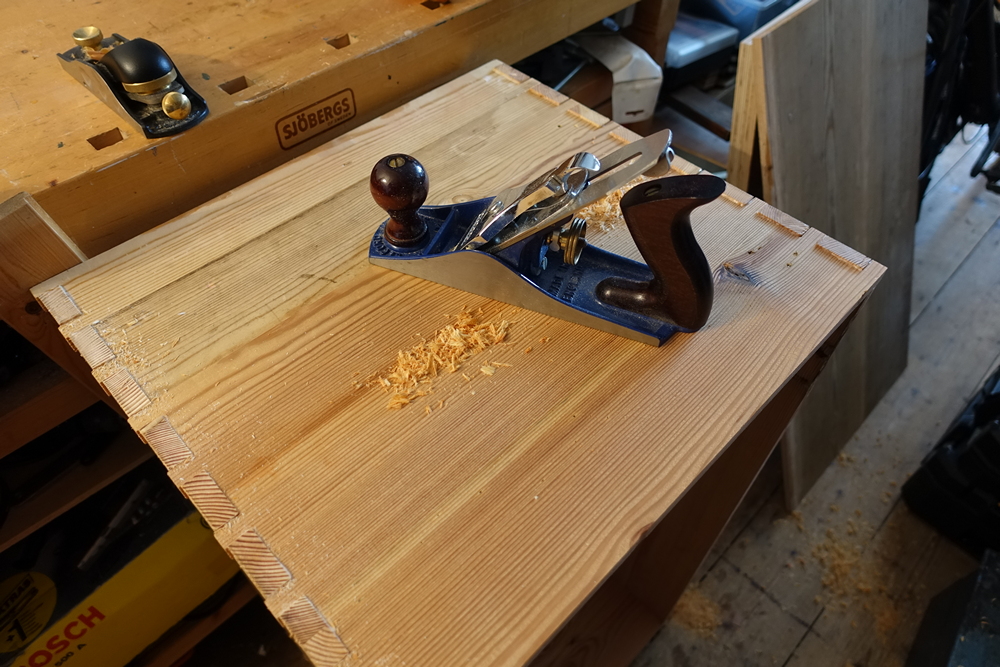
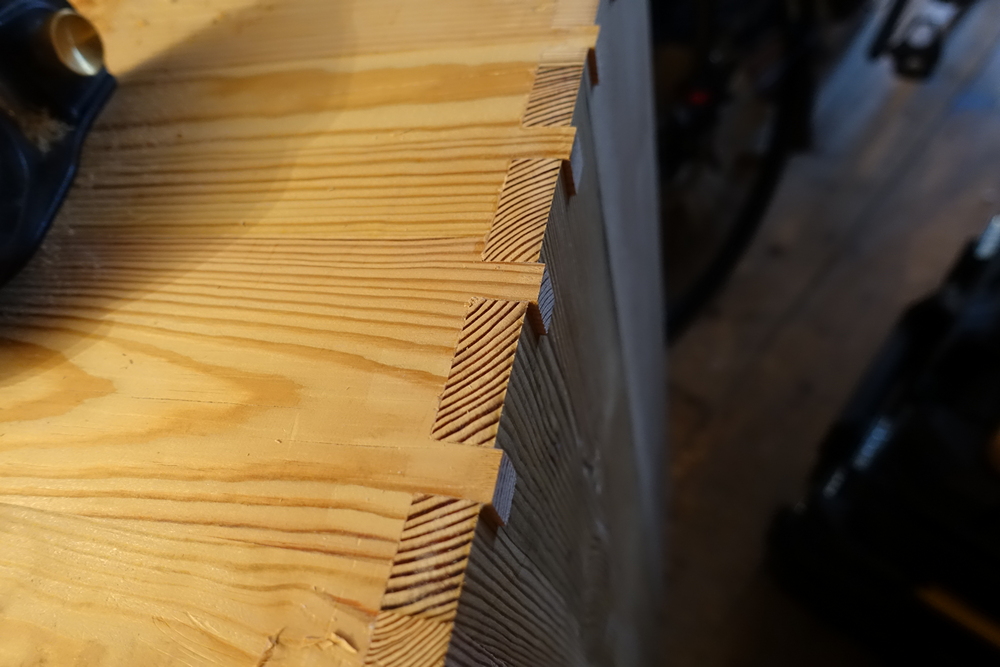

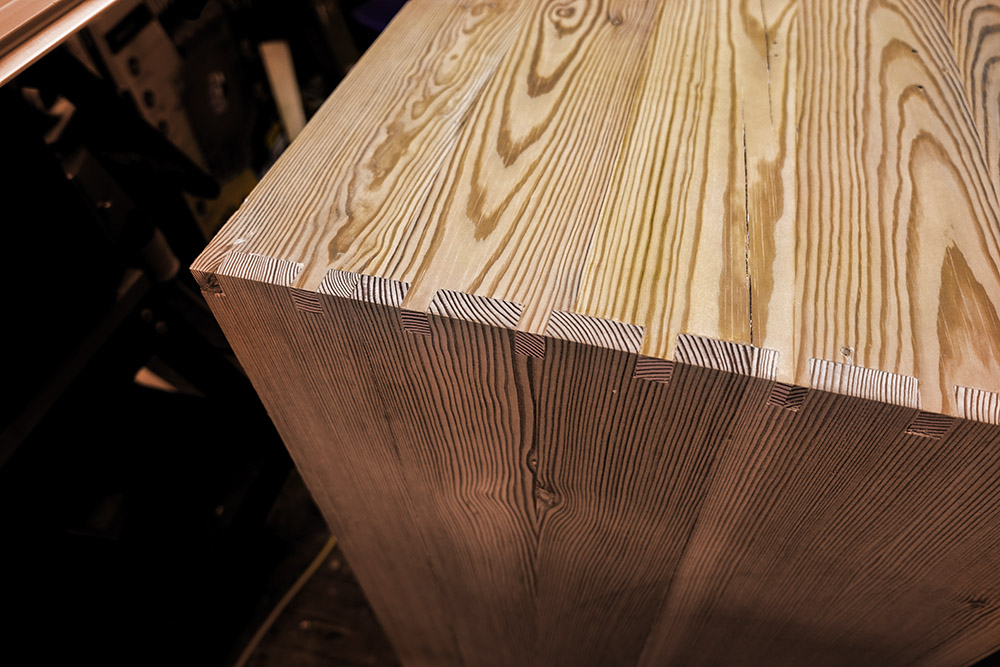
I was extremely pleased with the outcome of these joints. It had been worth the effort.
See Blanket Chest Part 2 to see how the project was completed.

The time lapse photo of the wood moving is really neat.
LikeLike
Thanks. It’s amazing that it only took an hour. This 200 year old wood is as ‘alive’ today as it ever was. (Almost)
LikeLike
Wood is just really amazing. I just wrote a short post on trees in my home improvement blog where I digress into my fascination with wood. You may enjoy it…https://suburban-trenches.com/2020/02/03/take-care-when-staking-trees/
LikeLike