I decided to make a small box for the first time in years. I just made it up as I went along really. I knew that I would use box joints cut on the bandsaw. Most other ideas like the base, the lid and the ‘handle’ came to me as I was making it.
I cut some African Mahogany for the sides, using the bandsaw. That included re-sawing from thicker stock.
Using a stop block to limit the depth of cut, and a series of spacer-strips against the fence I made the cuts for the box joints
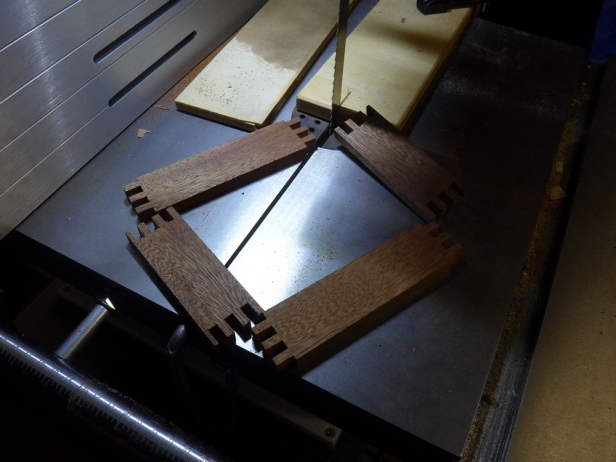
Then I cut out the waste by nibbling away using the bandsaw
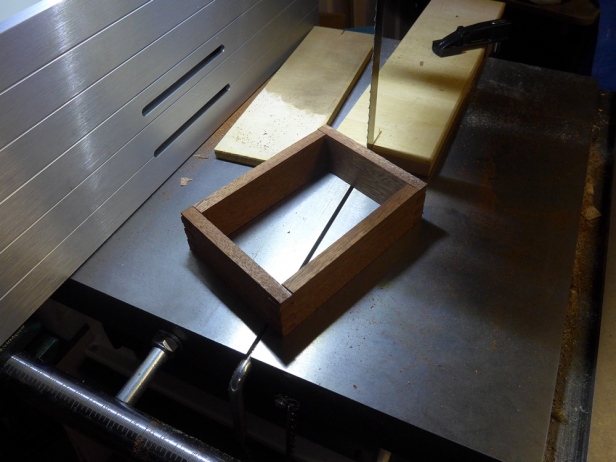
I did a test-fit
The joints were not as tight as I’d hoped for, but just about usable. I decided to use a piece of plywood for the base, recessed into the sides. So I needed to cut stopped rabbets along the bottom of each side. If I hadn’t stopped the rabbets short of the end of the pieces I would have ended up with holes in the side of the box. I marked each piece with a permanent marker to remind myself which edge to cut.
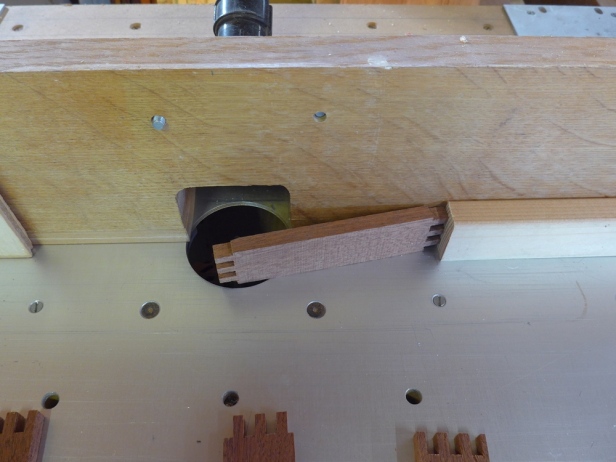
I set up stop blocks on the router table to prevent the rabbets going to the end of the piece
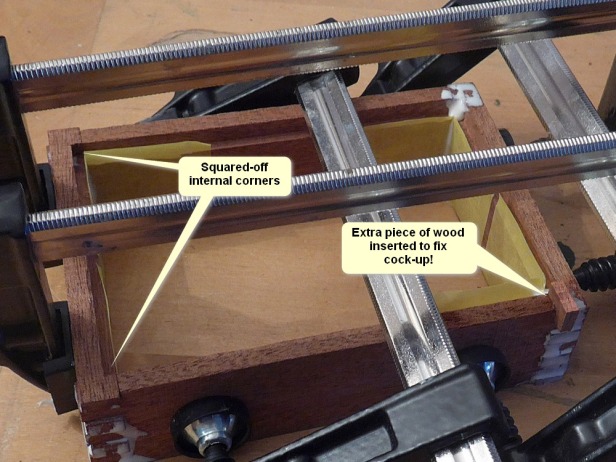
I dry-assembled again to see the results. Some more wood would need to be removed using a chisel to square-up the inside corners of the rabbet so that the bottom would fit
Whilst trimming the inside corners using a chisel, I accidentally broke off one of the fragile fingers (lower right corner in the photo).
I used masking tape to prevent glue squeeze-out inside the box. The outside didn’t matter as it would be sanded later
To fix the broken finger joint I inserted a small piece of matching wood.
Next I cut a piece of ply for the base and trimmed to fit using the block plane
Then I glued it in place using a minimal amount of glue and being careful so that no glue would squeeze-out on the inside of the box.
Now that the box was glued it was time to make the lid. The handle would be formed using a piece of maple between two pieces of what I had assumed was African Mahogany to match the box, but turned out to be a different wood altogether – probably Sapele or something. DOH!
Using a block of wood clamped to the router table and another strip along which my work-piece could easily slide, I carefully pushed the wood into the dome-shaped router cutter.
..resulting in a semi-spherical cut-out in each part
… which, after cleaning up with sandpaper, I clamped together sandwiching the strip of maple. Again I was very careful not to put any glue near the dipped section as it would have been very difficult to clean glue squeeze-out from there later
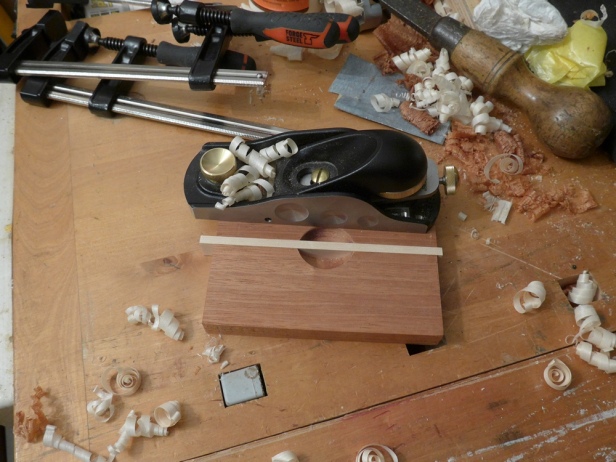
Once the glue was dry I trimmed the protruding maple using the block plane
.. then trimmed the ends, first using the bandsaw and then using my new shooting board.
Next, using a ¾” flat bit in the router table I ran a rabbet around the inside edge of the lid so that it would rest snugly in the top of the box.
I ‘crept-up’ on the final dimension by making a series of fine cuts, testing for a good fit after each one.
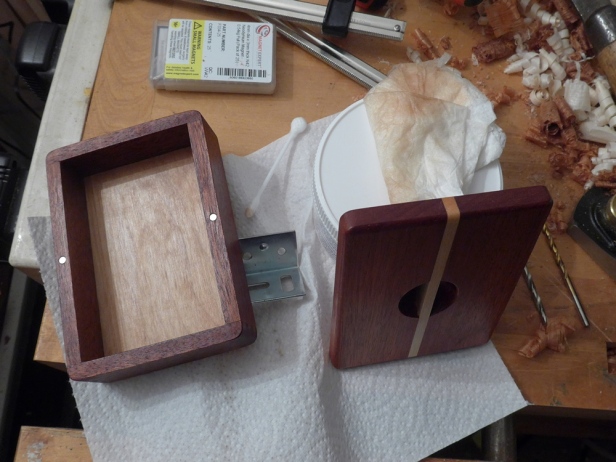
I used the belt sander to smooth the box and lid. I rounded the corners of the box using the disc sander. Then I drilled 4 mm holes in the box and at matching points in the lid to accommodate small neodymium magnets that would help hold the lid on
I glued the magnets into their holes using super glue, making sure I had the polarity correct by marking each magnet with a permanent marker indicating which end should go into the hole. One of the magnets I pushed in too far without glue but couldn’t get it out again so I just left it, hoping it wouldn’t fall out in service.
For a finish I used Brandon Bespoke Wax Oil Treatment, applied with paper kitchen towel, as directed, and left overnight. I used a cotton bud to get the wax into the inside corners of the box.
The next day I buffed the wax finish. It didn’t have as much sheen as I’d expected, so I added another coat of beeswax to the top only and buffed that.
Gallery
Click an image to enlarge it and scroll through other images
Tools used
- Table saw
- Surface Planer (Jointer)
- Bandsaw
- 6″ Belt sander
- Drill press
- Router table
- 6 mm straight bit (router, for base rabbet)
- 18 mm straight bit (router, for lid rabbet)
- 18 mm radius cove bit (router, for handle recess)
- 4 mm Bullet drill bit (drill press, for magnets)
- 120 grit belt (belt sander)
- Marples 18 mm bevel edge chisel
- Veritas Low-angle Block Plane
- Veritas Shooting Board Plane
- Various clamps
- Permanent marker
- Steel rule
Materials used
- African mahogany
- Sapele?
- Maple
- 4 mm plywood
- 4mm dia x 3mm N42 neodymium magnets
- Brandon Bespoke Wax Oil Treatment
- Beeswax
- Gorilla wood glue
- Super glue
- 36mm Frogtape masking tape
Things that worked well
- I like the design of the handle
- The magnets were an effective way of holding the lid on
- New shooting board worked well for long and end-grain planing
- Being careful with the glue and using tape prevented glue squeeze-out inside box
Things that didn’t work (and improvements)
- Used the wrong wood for lid!
- The maple strip of the handle should maybe have extended down the sides of the box for a more cohesive design
- I accidentally sanded through the top layer of plywood on the bottom! (see photos)
- Box joints were not as tight as I’d like (use another jig, not bandsaw)
- Not really a fault but it dawned on me afterwards that I could have arranged the magnets’ poles such that the lid would only go on one way round. Then the magnets would repel if you tried to put it on the wrong way. Invariably a lid will fit better one way or another; that trick would have enforced its orientation.
- I broke a piece off while cleaning the corners with a chisel. I realised afterwards that I should have left it until after the sides were glued before I tidied up the internal corners – that way the wood would have been supported underneath because all the ‘fingers’ would have been inter-meshed.
- Burnt the wood when routing handle recess (can still see it in photos) – maybe a slower router speed would have helped for such a large bit, but it was already fairly slow.
- Router snatched when routing rebate for base – should have used much narrower fence opening.
- Finish did not give the sheen I was after – have emailed manufacturers for advice.











Hi Vince,
Loved the trinket box,! A lovely job, well done.
You also made a really good job of the antique knife handle It looks good for another 100 years at least!
Keep up the good work.
Love,
Mum & Dad x
LikeLike