This post follows Part 1
Plinth
With the main carcass of the chest complete, I turned my attention to the plinth. Made from the same pine, I machined a 22.5º chamfer to visually reduce the bulkiness of the wood. In keeping with a quite common tradition, I left the rear of the blanket chest plain. The plinth only ran around the front and sides, so the chest could sit closer to a wall. Also I used butt joints where the plinth pieces met at the corners, rather than a mitre.
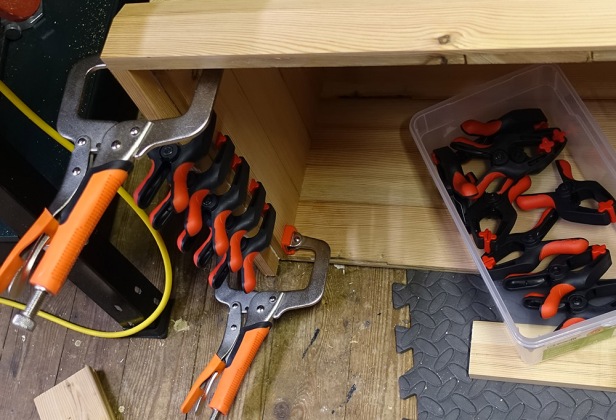
The plinth extended about 3cm below the sides and was glued in place along the overlapping part
I glued another strip of wood to the inside of the plinth and nailed it to the bottom edges of the carcass. This would support the bottom.
I sawed off the protruding moulding
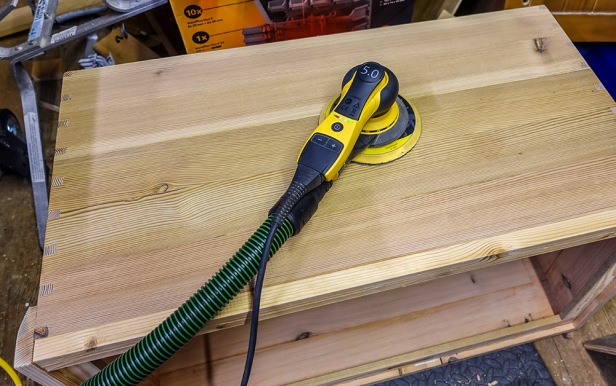
and sanded the carcass.
I gave the whole carcass one application of Blackfriar’s Antique Pine wood dye.
Then I fitted some iron handles I’d bought specifically for this project. I made no attempt to fill, or otherwise disguise, various holes and imperfections that ‘featured’ on this reclaimed wood.
Lid
For the lid I used some of the large ½” panels recovered from the old doors. I would only have to glue two together to make up the width of the box.
The panels were almost one piece of pine but had been extended width-wise using a loose tongue along the length.
I didn’t need the full width of both boards so I ripped the narrow piece off one of the boards, close to the join line, using the table saw. I didn’t notice anything unusual during the cut, but afterwards I was annoyed to see that there had been three de-headed nails embedded in the wood that my saw blade had gone through. Damn.
There was no evidence of these nails from the outside. Presumably they were used to help with the glue-up of the panels when the doors were made. I had never seen this method before so had not been expecting to find metal inside the wood. I should have scanned first with a metal detector.
I inspected my saw blade for damage. It’s difficult to tell from the photo, but three or four teeth on the blade had sort of burred over. I filed off the rough bits and the saw seems to still cut OK.
I next glued the two boards together to form the top
One of the pieces I’d used had checks running the whole length of it. It was so weak that I could feel it flex as I held it. I could easily have just snapped it in two with hardly any effort. I wasn’t too worried about this weakness as I intended to use braces on the underside of the lid to help with keeping it flat.
The checks went through the whole thickness of the wood
I decided to fill the cracks with epoxy mixed with sawdust of the same wood which I had collected in the dustbag of my random-orbit sander when sanding the carcass.
Once the epoxy had cured, I smoothed it level using a cabinet scraper
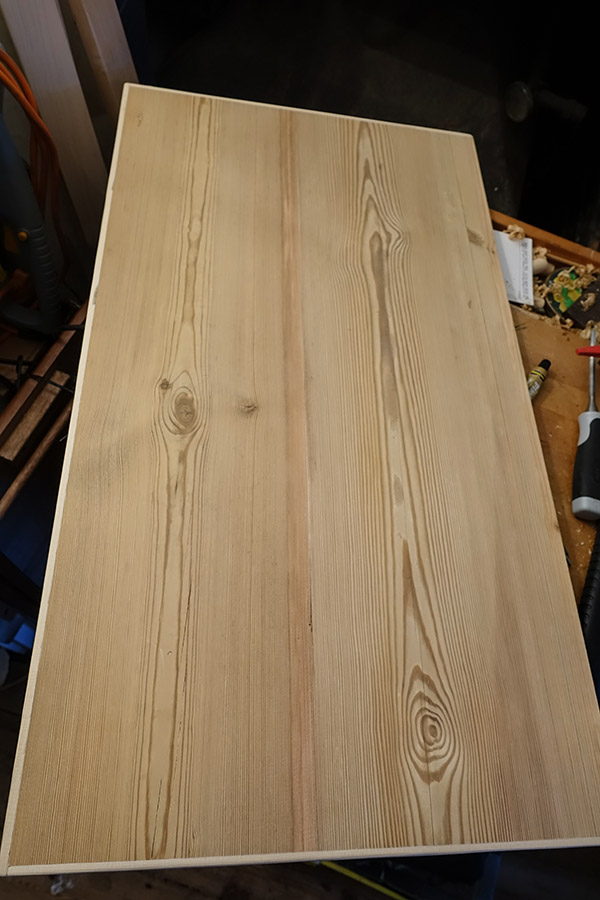
Then I sanded the whole board, which removed some paint remnants and a layer of grime present on the un-machined boards
The checks were still visible, but no longer a weak spot, thanks to the epoxy filling
The board no longer flexed when handled. Next, I trimmed the lid to length
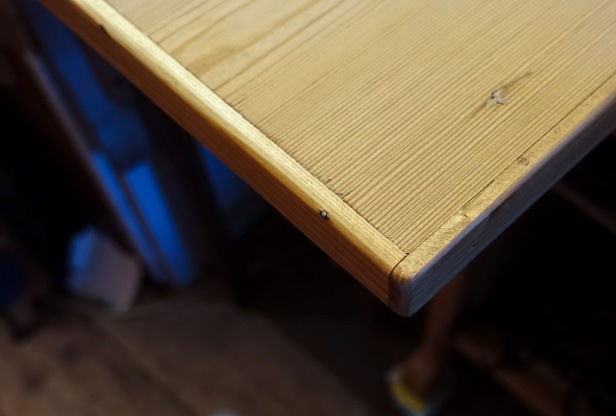
I made an edging for the lid (only to go on front and sides, same as plinth). I used some other pine I had laying around. I put a 45º chamfer on the lower edge and run a rebate along the inside top for the edge of the lid to locate in. Then removed some wood at corners where it would overlap the adjoining piece.
Unfortunately the router had caused quite a bit of break-out due to grain direction, maybe a blunt cutter, maybe the wrong speed, or all three! This left unsightly gaps between the lid and the edging
I would fill these later. I fitted the front lip with glue only.
But glued and nailed the side pieces due to opposing grain direction.
After the glue had dried I filled the nail holes and those gaps caused by the break-out, then sanded smooth
Unfortunately, the wood I had used for the edging was lighter in colour than the old wood of the lid
So I had to carefully stain the lip only, being careful not to get any stain on the rest of the lid. Then I did another coat of stain over both the lip and the lid. So the lip had two lots of stain. In fact I did the lip one more time, so it had three lots, in an effort to match
Bottom
The bottom of the box was made from ‘lesser’ pine, as can be seen from the knots. I trimmed pieces to length using a stop-block on the RAS.
Then I ran a rebate down two opposing edges so that the pieces would overlap and allow for wood expansion/shrinkage without causing gaps in the base of the box
In fact I cut the pieces (which had been stored in the higher humidity environment of the workshop) to fit the base exactly. But after they had been left in the house for several days, they had already shrunk to form a gap. This is exactly why I had cut them to overlap.
When I later came to nail them in, I distributed the boards evely to spread the gap so it was no longer noticeable
Hinges
The design of the hinges required that I made fillets to mount them on and that I cut a notch to allow the lid to close at the correct height
By marking the shape of the hinge on the fillet, I made sure that the screws for the fillet were hidden and that they wouldn’t be in the way of the hinge screws
I clamped the lid in place temporarily, using sanding pads as spacers, while I marked and drilled the holes where the hinges attach to the lid
Then I made a stay for the lid using a piece of leather strap I’d kept from an old wicker basket.
Finish
I gave the lid and carcass three coats of matt acrylic varnish.
I nailed the bottom slats in using my brad nailer, then reattached the hinges, handles and strap, and it was finished! At last.
Gallery
Tools used
- Table saw
- Bandsaw
- Tuff Saws SuperTuff Fastcut Bandsaw Blade 3/4″
- Radial arm saw
- 13″ thicknesser
- 6″ planer
- Router table
- 22.5º chamfer bit (router)
- 45º chamfer bit (router)
- 12mm flat bit (router)
- Veritas low-angle block plane
- Record No4 smoothing plane
- Robert Sorby square
- Chisel
- Dewalt random-orbit sander
- Mirka random-orbit sander
- Cordless brad-nailer
- Cordless jigsaw
- Marples cabinet scraper
- Rasp
- Cordless drill
- 3mm drill bit
- Self-centring hinge bit
- Countersink bit
- Various clamps
- Hammer
- Nail punch
- Water spray bottle
- Flush-cut saw
- Credit card (glue spreader)
- Glue brush
- Acer ADP2 Professional Deep Pencil Marker
- Microsoft Excel (to design the box joint layout)
- Volkswagen Golf Mk4 (to collect the doors)!
Materials used
- Reclaimed pitch pine
- Other pine (for bottom)
- Leather strap
- Screw cups (for strap)
- 2 x Penny End Cranked Strap Hinge – Antique Iron (Ironmongery World)
- 2 x Cottingham Regal Chest Lifting Handle – Antique Iron (More Handles)
- 80-grit Abranet abrasive sheet
- 180-grit Abranet abrasive sheet
- 30mm panel pins
- 30mm 18g brads
- Blackfriar wood dye (Antique Pine)
- Liberon Natural Finish Interior Varnish Matt
- Rustins Plastic Wood
- Uhu Epoxy
- Cascamite wood glue
- Gorilla wood glue
Things that worked well
- The complicated box-joint method for bandsaw gave excellent results
- Flattening the panels by dampening one side
- Using cabinet scraper to remove glue – I’d forgotten how well cabinet scrapers work
- Filling checks with wood-coloured epoxy – excellent result
- Leaving the bottom until last made positioning and fitting the hinges much easier, working from inside the chest
- The new Tuff Saws bandsaw blade was excellent. It ripped through the pine with ease
Things that didn’t work (and improvements)
- Sawing through embedded nails with table saw – should have scanned with metal detector first
- Break-out when routing rabbet on top edging – maybe sharper cutter, pay attention to grain. Climb-cutting would have worked but tricky to do
- Could have saved some break-out on bandsaw, when cutting box joints, by using a sacrificial piece of ply/etc under the work
- Should have used same wood for top edging for a better colour match


nice writeup. Appreciate the craftsmanship, Many use the “reclaimed wood” comments as an excuse to hide sloppy joinery. This looks really great.
LikeLike
Thanks for your comment – really appreciate it. I know what you mean – don’t get me started with ‘pallet furniture’ which ends up looking like …. well, a load of pallets nailed together! Cheers
LikeLike