Following on from my last post where I built a prototype of the candle sconce, here I describe how I made a real one and how I ‘aged’ it.
I had acquired some wood left over from a kitchen refit. I’m pretty sure it’s Poplar, which means it’s close-grained, a bit ‘fluffy’ and mostly featureless, which, along with the almost complete absence of knots, makes it ideal for a project on this small scale. I normally balk at the thought of painting wooden objects, preferring to show the beauty of the figure of the wood in all its natural glory, but with this being Poplar I had no reservations about covering its blandness with paint.
First I re-sawed several lengths down to 10 mm thick.
and ran them through the planer
I started by making the back part first. I didn’t have any wood wide enough for this so I made it from two pieces, the edges of which I squared-up using the shooting board
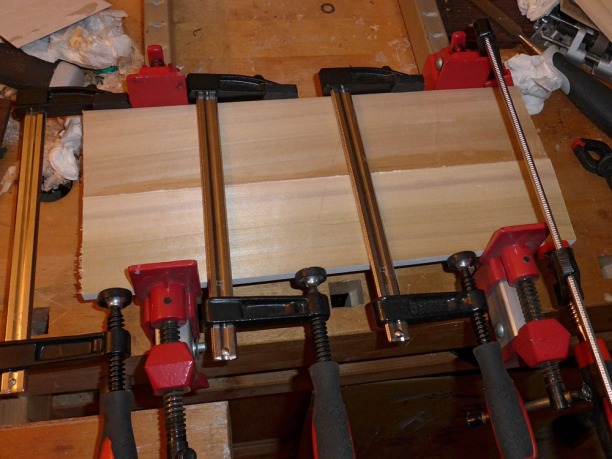
and then glued and clamped them, arranging them to ensure that the composite piece would have the all the grain running the same way, so I could run it across the planer to smooth it out with no break-out.
I cut the piece to the correct width and, placing the template I made last time on top, I marked off the shape of the back part onto the work-piece below
.. and then cut away the bulk of the waste on the bandsaw
With the piece attached to the template jig, I used the router table to trim to the exact shape, in the same way I did when making the prototype. I then made the two side parts, again in the same way as before.
I then cut a piece for the shelf and another piece for the base. I cut the base piece from some wider stock and noticed it was cupped so I removed the cup using the planer, before re-sawing to thickness. After leaving the prepared pieces in the house overnight I noticed the base piece had cupped. Obviously this was due to the wood drying and returning to it’s normal shape but because I had taken the cup out while it had a higher moisture content, it had now moved back in the other direction, introducing a new cup! So, again, I should have left the wood for this project in the house for about a week before preparing any of it. I didn’t want to use the cupped base part so I decided instead to join another couple of narrower pieces together. I now had most of the parts ready.
When the finished piece is destined to be painted you don’t have to worry about things such as router burn marks, the likes of which can be seen above.
I started assembly by gluing one of the sides onto the back
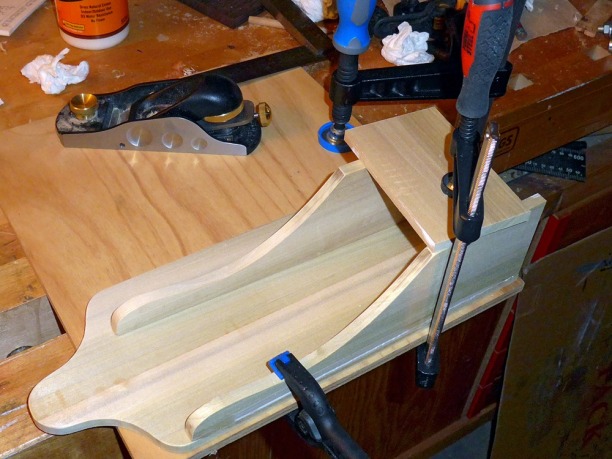
.. and then attached the other side and the shelf and the same time, clamping the pieces together in various planes and using an engineer’s square to correctly align the shelf
Next, to make the base part, I surfaced the bit I had glued together earlier
Then I used the table saw to cut out the required size, and then sanded the corners using the disc sander (I could / should have used my new router corner templates, but this was quicker, although not as accurate)
On the back of the back part I measured and drilled a 12 mm hole
.. drilling from each side to avoid tear-out
Now I had established where the hole should go, I took the time to drill a matching hole on my template, so I’d know in future where the hole goes without having to measure again
The original of this and similar pieces have a drawer below the shelf, but I had decided to have a sort of flap-down compartment that would retain the same look. I designed it like this so that when I came to use it I would be able to quickly reach in and get my door key out with one hand. As usual I had made things more difficult for myself – a drawer would have been easier to make. I cut 5 pieces of wood to roughly the right shape. One already had a chamfer along one edge so I just used that to decide on the angle of the back, and cut the sides appropriately. I first glued the bottom (a narrow strip)
.. and after block-planing the angled pieces to for a good fit, I glued the whole lot together and ‘clamped’ with rubber bands
Once the glue had dried I sanded the drawer down and wedged it in place using cardboard and a clamp
.. and then drilled holes through the side and into the drawer using a 2 mm bit. These will take the panel pins that will act as hinges
Next I made the knob for the ‘drawer’ pull. Using a 40 mm hole saw I cut into some African Mahogany to a depth of about 10 mm
and then removed the guide bit from the hole saw and finished the rest of the cut with just the saw part, so that I wouldn’t have a guide hole going right through the knob blank.
I cut the blank out using the bandsaw. First I measured the depth of the hole using a drill bit
and then setting the fence to that distance and started sawing…
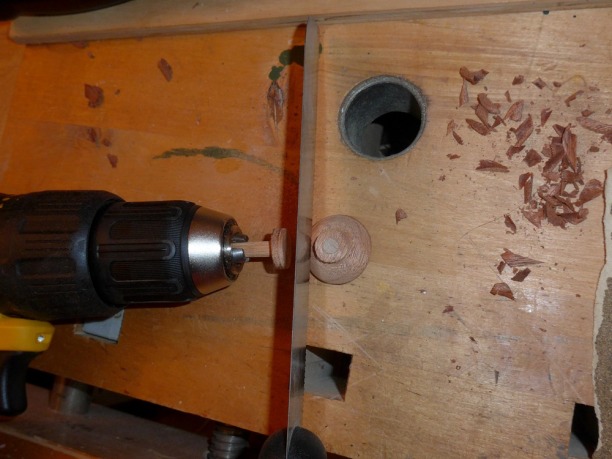
I glued a 6 mm dowel pin into the hole in the blank left from when I’d used the hole saw. Then I mounted it in my drill and spun it against the band saw blade and shaped it in a similar way to using a lathe.
Still mounted in the drill, I rotated it against abrasive to smooth it
With it still mounted in the drill I spun it anticlockwise (so the top was spinning away from me) and cut the waste part of by applying a pull saw to the spinning knob.
For the star detail I cut a star from mahogany after having printed the shape, cut it out and drawn around it.
I did some crude trimming using the bandsaw
.. and finished shaping it using a ½” chisel. While doing this I accidentally broke off the tip of one of the points, so I then had to trim the others more and gave it a somewhat stubbier shape.
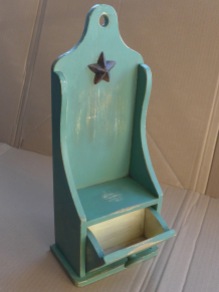
With all the parts made, but not yet fully assembled, I sanded everything smooth and over-sanded some parts to ‘wear them out’. I gave the whole lot a coat of Dulux Citrus Grove sampler that I’d had on a shelf, gathering dust for over fifteen years
That dried in no time. I sanded it down again and gave it a coat of Wickes Satincoat Cactus. Again, you can tell by the slightly rusty tin lid, this had been on the shelf for over 15 years!
It didn’t cover the yellow very well and required a further coat. After that I sanded here and there to emulate wear that the item might have suffered over the years. Mainly on edges, where paint tends to be thinner, and where fingers would have touched it in use, such as the knob and the top middle of the draw.
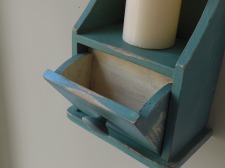
I super-glued the knob on. I wasn’t sure whether I liked the star ornament so I fixed it on with a small square of carpet tape. In places where I’d sanded right through to the wood underneath, it looked too light, so I tried to emulate a darker older wood by applying some Medium Oak wood stain and wiping it off. This had the effect of making it look a bit grubby, so that was even better. I wiped some into the inside corners using a cotton bud to mimic a build up of grime, and near where the candle flame might have been. I also ‘grimed-up’ the inside of the drawer.
I glued a piece of folded cardboard inside to stop the back of the swivel drawer going too far back. I clamped it in place while the glue dried
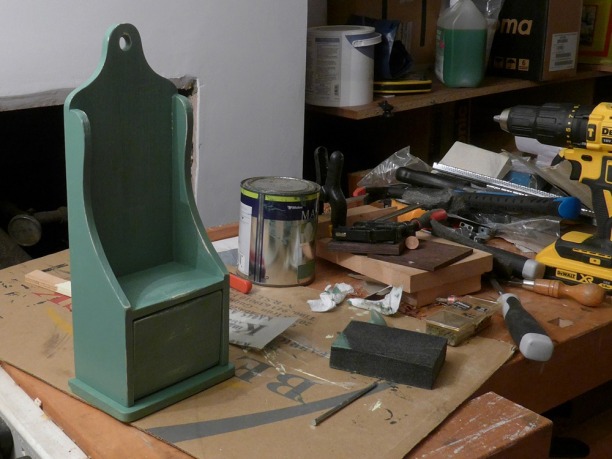
And that was it finished, really
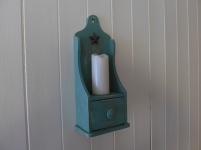
I have mixed feelings about the candle. I think it’s too big, but I also like the look of the piece without any candle. And if I made another, I would reduce the size of the knob.
Gallery
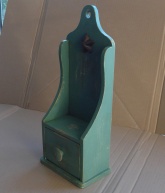
Click an image to enlarge it and scroll through other images. In case you’re wondering about the different shades of green in the photos. This is caused by different ambient light. The actual colour is more like the first few below, rather than the blue-tinged ones.
Tools used
- Table saw
- Bandsaw
- 6″ Belt sander
- 9″ Disc sander
- Mirka hand sanding block
- Router table
- 12.5 mm bearing-guided straight bit (router, trimming curves)
- Pillar drill
- 40 mm hole saw (to make knob)
- 12 mm forstner bit
- 1.5 mm drill bit (for nail hinges)
- Marples ½” chisel (to carve the star)
- Shooting board
- Veritas Shooting Board Plane
- Veritas Low-Angle Block Plane
- Cordless drill
- Various clamps
- Digital caliper
- Steel rule
- 6″ steel engineers square
- Pencil
- 1″ paint brush
- Glue brush
- Cotton bud
Materials used
- Poplar
- Mahogany
- Gorilla wood glue
- Double-sided tape
- Super glue
- Colron wood dye – Georgian Medium Oak
- Cotton bud
- White spirit
- 2 x 20 mm panel pins
- Dulux emulsion – Citrus Grove
- Wickes Satincoat – Cactus
Things that worked well
- The method I used for making the knob worked really well, especially the fact that the ¼” hole left by the hole saw was just the right size to insert a dowel and then spin in a drill (or lathe).
- The flap-down compartment worked well, and is stable in either the open or closed positions. A drawer might have been easier (and certainly roomier)
- Even though I didn’t use milk paint or chalk paint, etc, the finish I was able to achieve worked very well, especially the use of wood dye to add some grime.
Things that didn’t work (and improvements)
- I should have made the base larger – it should have protruded at least another 3 mm all round
- The knob was too big – see the photo on the prototype post for comparison
- Maybe the whole item was slightly too small. Since making this I discovered that the original (shown on my previous post) was 18½” tall, compared to mine at 13″ tall. Maybe one at 15″ tall and proportionally larger all round might work better. Having said that, it depends on location. It looks great in a small cottage.
- I chipped a part of the star emblem when carving it. Should have been more careful near the fragile pointed tips.
- Before I inserted the dowel into the knob blank, I tried using a screw and I accidentally drilled right through the front face of the knob. You can see this in the pictures. I could easily have filled the hole, but as this was a rustic piece I just left it.
- The hole saw worked well, but after using it, the saw was jammed onto the arbour. Despite diligent internet research I was unable to remove it, even with the use of an impact driver.


















I love the color of this! 🙂 It looks really unique, thanks for sharing the idea
LikeLike
Thanks for your kind words.
LikeLiked by 1 person